| M4A2 Sherman | Heller Kit #79894 |
| Article by Doug Chaltry; last updated: 10 October 2024 | |
 |
|
| Modeling the Sherman Tank in 1/72nd Scale |
| M4A2 Sherman | Heller Kit #79894 |
| Article by Doug Chaltry; last updated: 10 October 2024 | |
|
|
| Stephen
Brezinski already wrote an excellent construction review for this Heller kit, so I'm not
going to repeat any of the fine things he had to say
about it. But rather I will point out some quirks in the
kit's construction that I found during my own experience
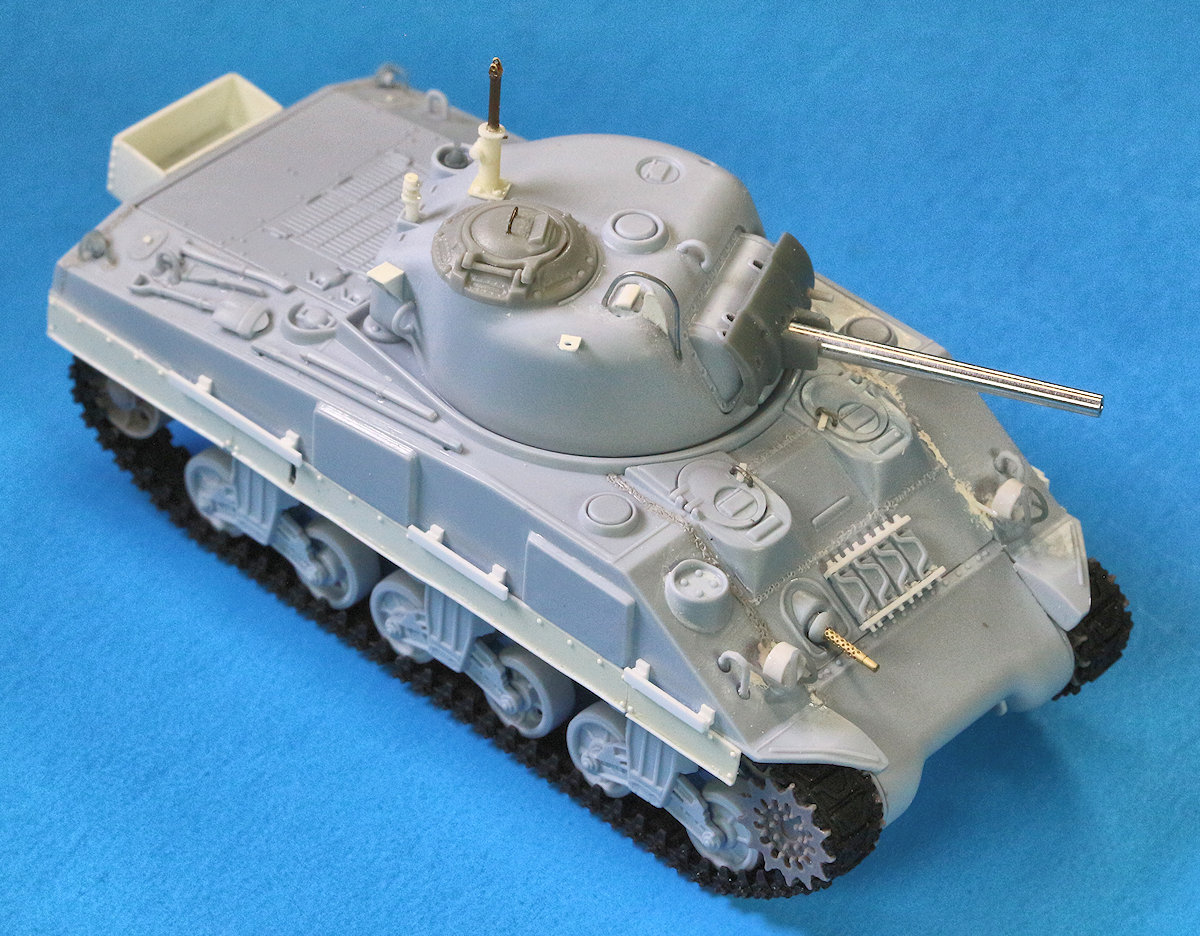
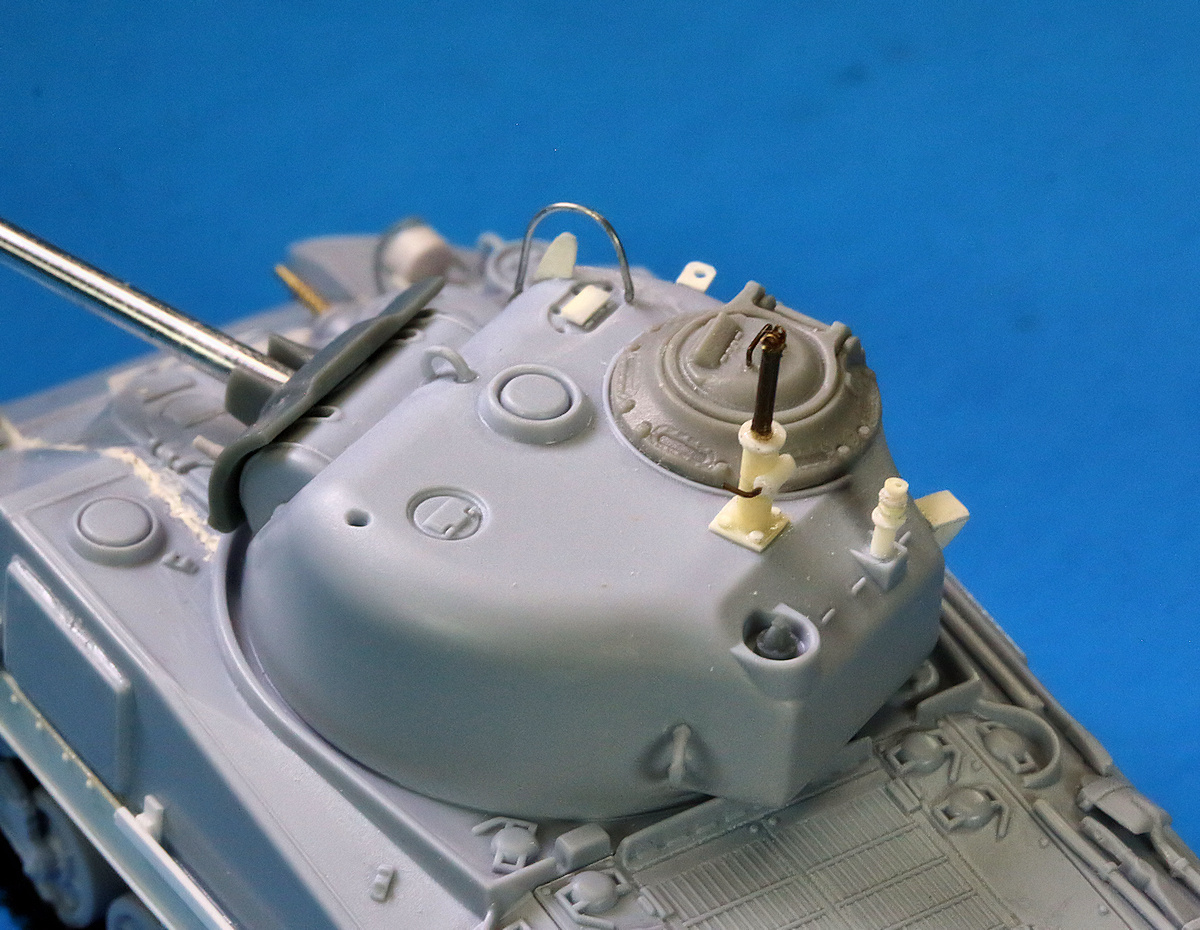
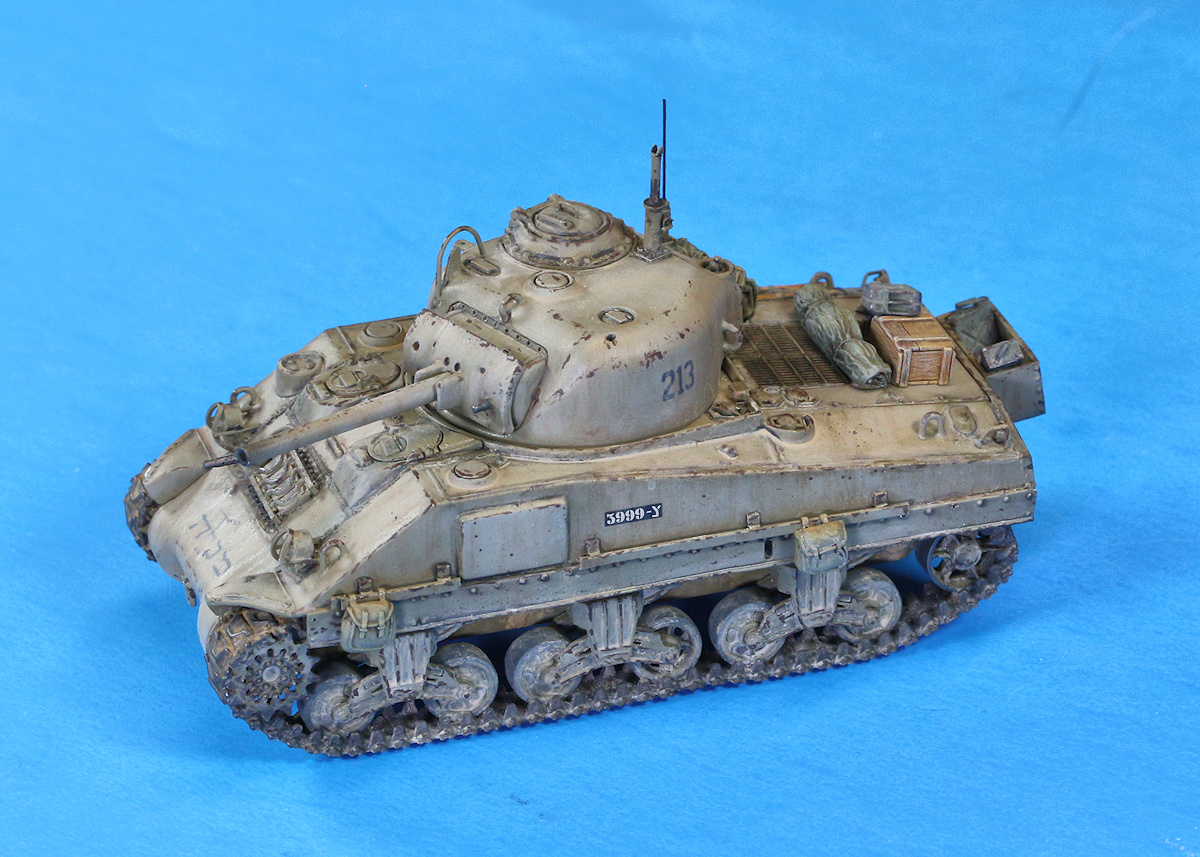
at building the kit. I was building the model to represent "Mier/Mania", Israel's first Sherman tank. That tank had a lot of unique features to it, which I incorporated into the Heller kit through some swapping of parts from other Sherman kits, and judicious use of scratch-building. This first photo shows three of the items that I replaced:
First, although this tank had an early, low-bustle turret, the Israelis swapped the split turret hatch for an all-around vision cupola for the tank commander. I took one of these from the Dragon M4A2 Beutepanzer kit, which doesn't need it. Second, the M34A1 rotor shield: the Heller kit part is really not that great, particularly the armored shields on both sides of the gun barrel, so I took one from an Eduard kit, which doesn't use it. The Eduard piece is very nice. And finally, the Heller gun barrel is too short, so I used a metal replacement barrel from, I believe, CMK. The .30cal bow machinegun is a brass barrel from MiniWorld. I scratch-built the spare track link rack and the headlights, which were non-standard.
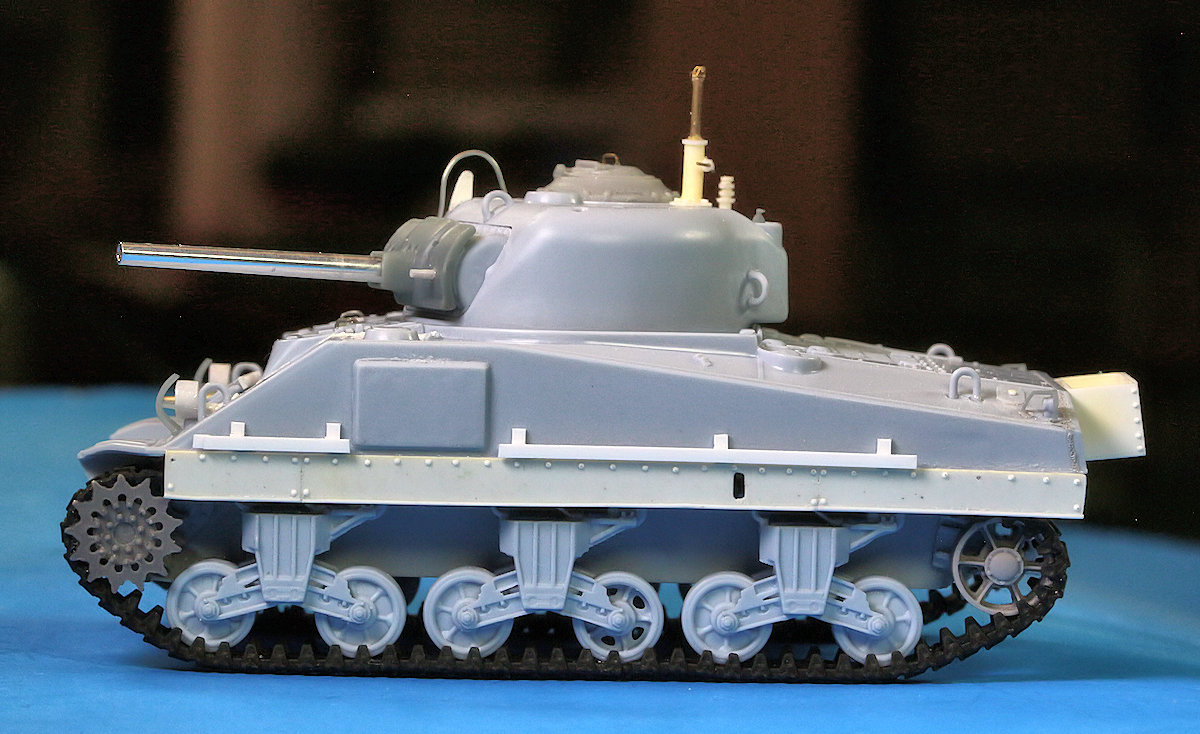
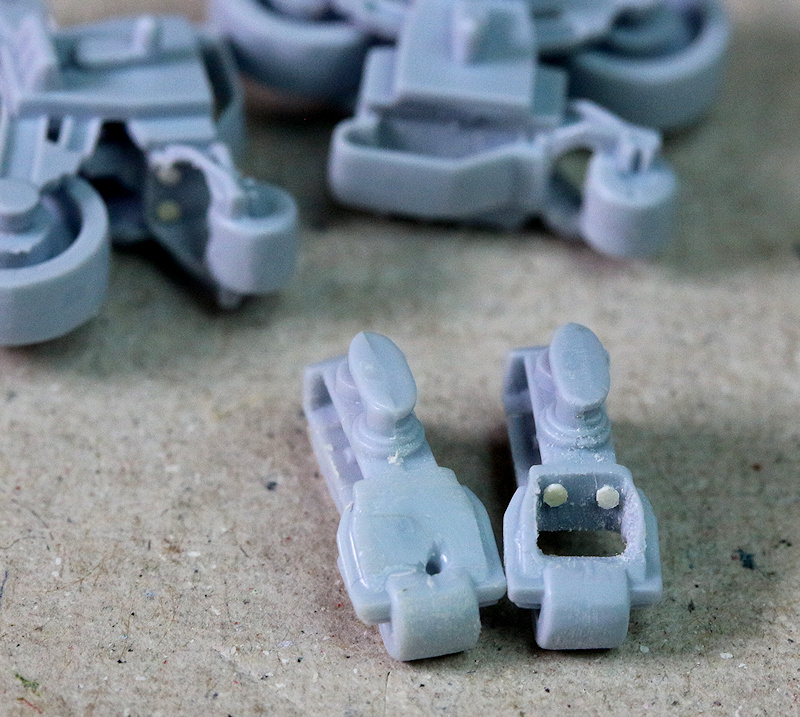
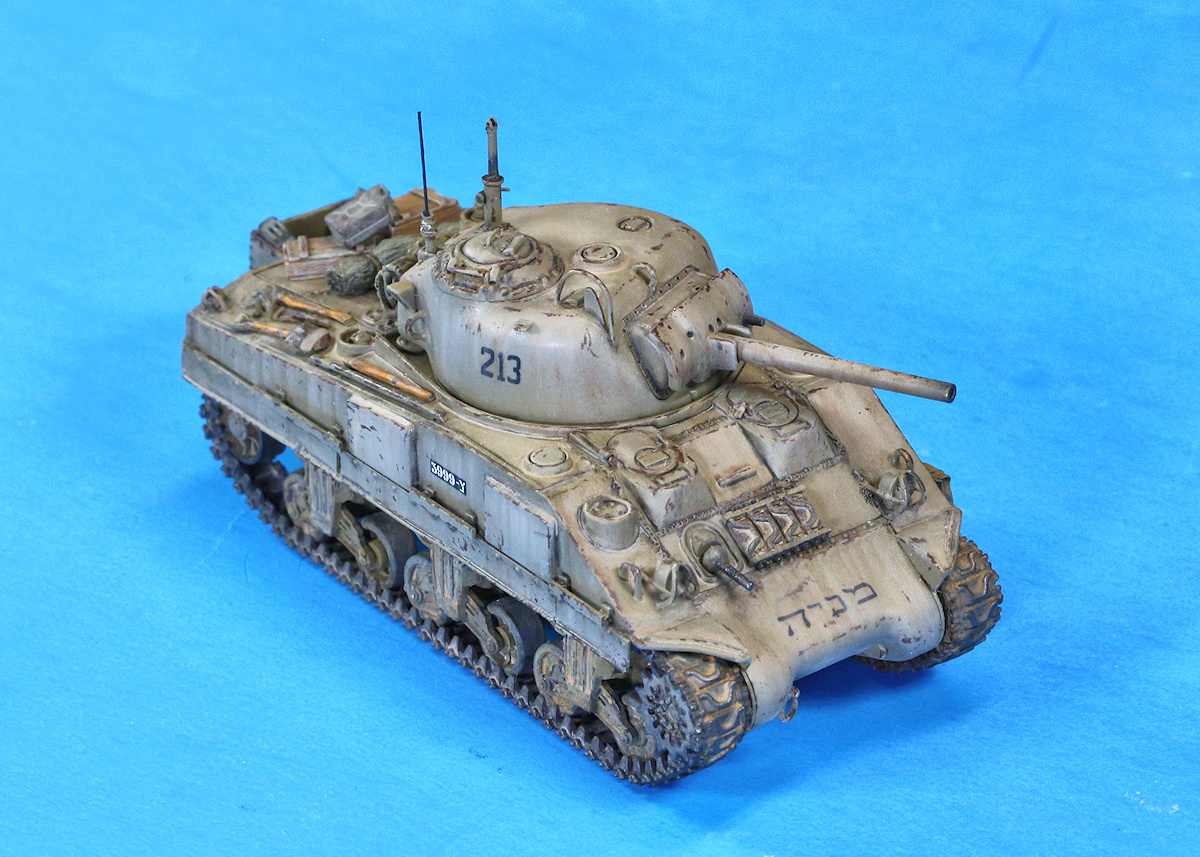
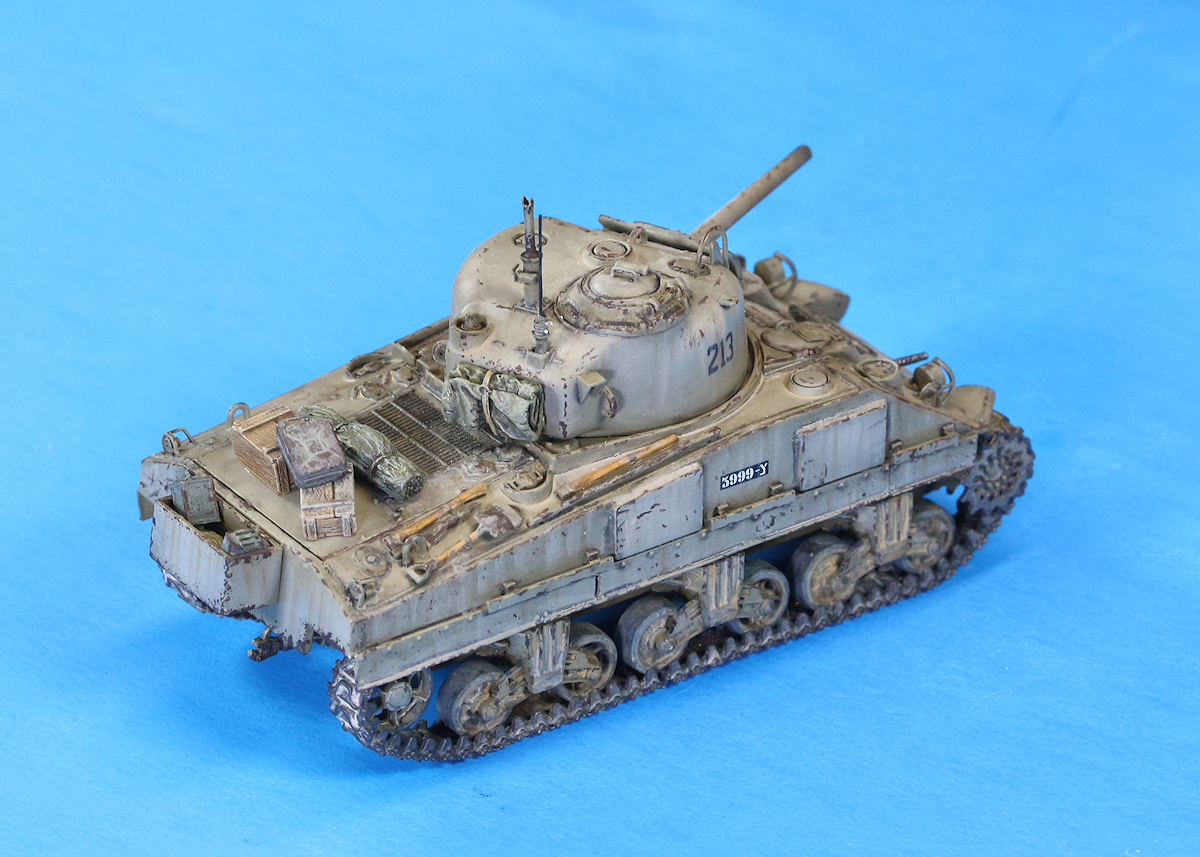
I had to make the side skirts myself, as they were non-standard, as well as the mounting brackets for the "Houseboat" camouflage system. The rivets on the side skirts are 3D decals from Quinta Studios. The storage bin on the hull rear is made in the same manner. You can see that I used a mix of the two different styles of road wheels, to match the photographs of the real tank. And I replaced the sprocket and idler wheels with parts from OKB Grigorov. The coaxial .30cal machinegun is a 3D-printed piece from Format72, which is really nice; too bad we can see only the tip. Headlight and taillight brush guards are also 3D-printed, from Firma49. The image below shows a modification I made to each of the bogie units; the return roller bracket is molded solid in the kit, so I hollowed them all out, and added a pair of hex bolts along the bottom edge. Technically, there should be four bolts, with two more along the top edge of the bracket, but there is no way the top two would have been visible on the completed kit. One can barely see the two that I did add. The bolts are a little over-scale, but it was the smallest punch that I have.
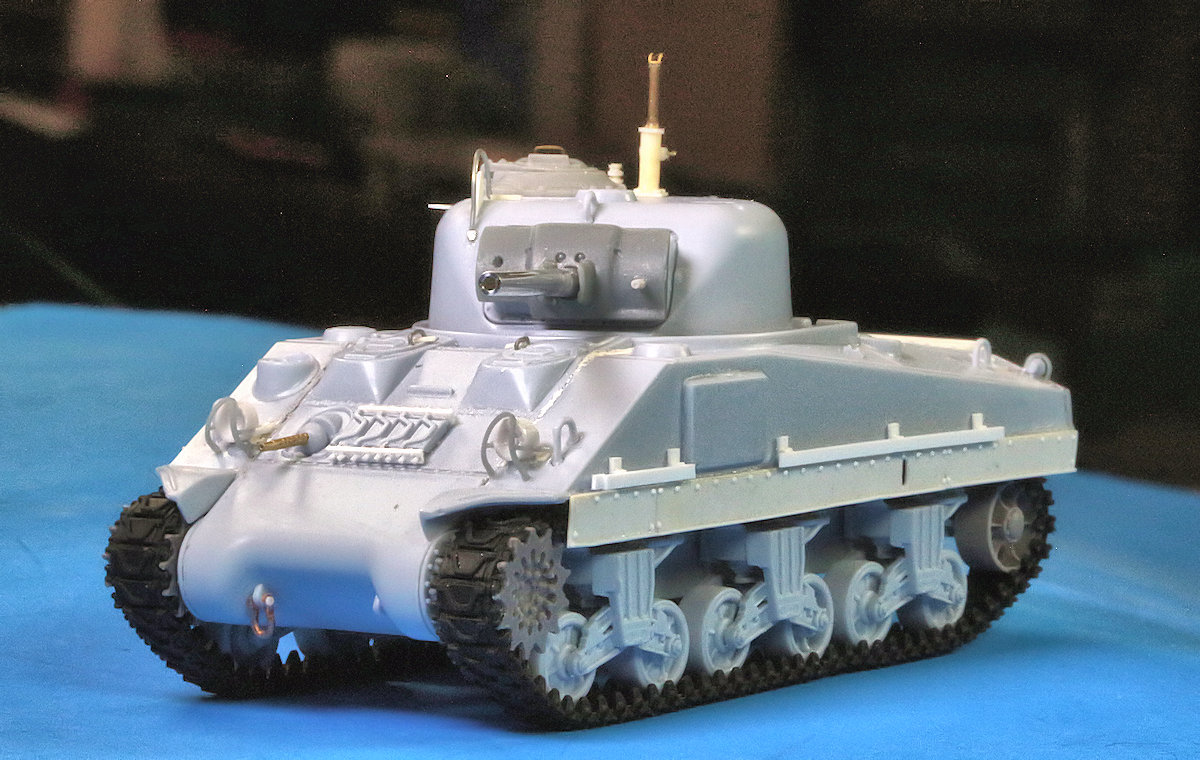
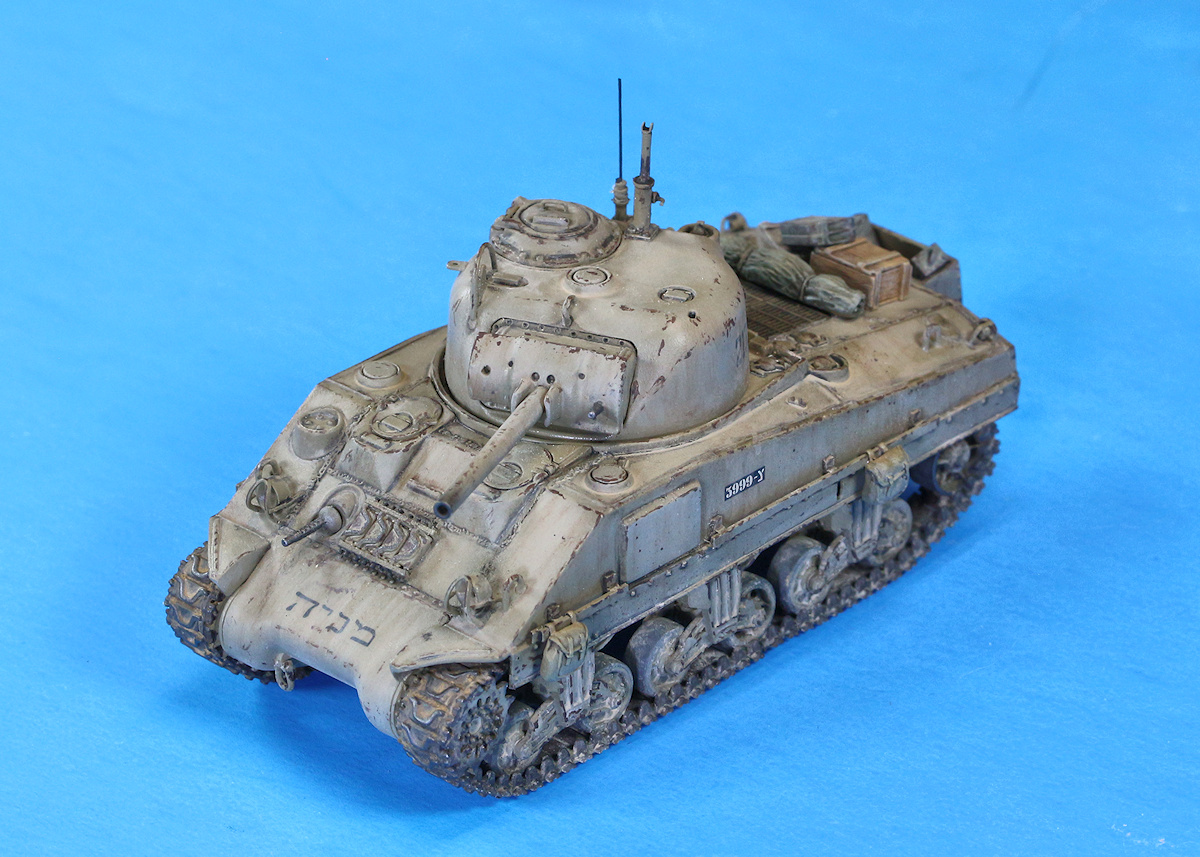
The following image shows the details I added to the turret. There was a unique gun sight, for which I used bent wire and a blade sight out of plasticard. Two unusual brackets were added to the right side of the turret (the rear one is supposedly a mounting bracket for some kind of sundial?). I added one antennae mount from Firma49, and scratch-built a second. And I also made the machinegun mount, which was raised unusually high on this tank.
Some problems that I encountered when building the model: as mentioned in the Previews for this kit, the weld beads are too prominent. I scraped off the ones on the hull front, and tried to replicate new ones using two different brands of putty, neither of which worked very well (this technique has worked in the past, so I think I'm just out of practice). What I found to actually work best on this kit was to brush some liquid plastic welder cement (the MEK kind) along the length of the weld, let it sit a couple minutes to soften up, and then used the tip of a putty knife to press some texture into the softened plastic to represent the weld beads. I then sanded them down to a more realistic height. For some reason I did not do this with the welds along the length of the hull sides; I think I was in too much of a hurry to finish. Another problem I had was with the locator holes for the brush guards and the pioneer tools, which were very large, and quite obvious after the parts were mounted. For the brush guards, I tried to use some larger blobs of super glue to attach the parts, hoping that the dried glue would look like welds. I just ignored the holes by the tools, hoping that the painting and weathering would hide them, which I think was successful. Except that now I told you about it, you're going to go look at the close-up photos to see them. Next time I will fill them ahead of time. On a similar note, the engine plate was not a tight fit into the open engine deck, and had fairly prominent gaps around the edges after attaching it. Again, I left them be, and once the tank was painted, they don't really stand out, unless you look for them. I also am not happy with how shallow are the depressions in the engine access grates. I pondered this when I Previewed this kit, whether it will be easier to paint the entire grate black and drybrush the raised relief, or to paint it with the base coat, and use several layers of wash. I chose the latter approach, and am very unhappy with the result, so next time I'll try the other option.
Now, as for things that I could do better myself, well, you can see how easy it is to get carried away with the paint chipping. This is the first time I tried painting on prominent paint chips, and I ended up taking it way too far. The thing is, I KNEW that it was too much. I always used to say that I think people take the paint chipping too far, especially on models in small scale. But once I got into the groove, the lower part of my brain kept thinking how cool it looks, and I just kept going. Lesson learned for next time. Also, I tried using the sponge method of applying the paint chips, and I simply could not find a sponge with a fine enough "grain" to make it look reasonable in this scale. The really bad chipping you see, particularly on the rear hull, was because of this. So I pretty much will just stick to using the paint brush from here on out. Another mortal sin that I made, and one that I often am critical of on others' builds, is the unsecured stowage items on the rear deck. I honestly had planned on fabricating some ropes or straps to hold it all in place, and I guess it's not too late to do so. But in order to get this thing done in time for my club meeting, I just glued down the stuff and moved on.
I think I did a decent enough job on making the tank look dusty, without going too far, but honestly, I do think it could have used a little more. The techniques that I've seen in books and online have all been for large scale models, but I think that all we need to do for this scale is use smaller brushes and smaller motions, and it turns out OK. Oh, the decals I used are from SabingaMartin, and are pretty good. These are simple colors for this particular scheme, but the other schemes on the decal sheet are more colorful, and they are printed very well. But the carrier film was just a little thick. I tried using some decal solvent to dissolve some of the film, but it started to discolor the paint, so I had to stop. It took a couple of layers of clear coat over the top to hide the decal edges. Which reminds me of another lesson: the techniques I've seen for painting and weathering tank models use several layers of products: the primer, the base coat, highlight coats, a satin clear coat, more weathering products, and finally a matte coat to cover and tie everything together. Some of the detail on the kit ended up getting a little "blurred" in the process, softened, if you will. Not as big a deal on large scale models, but in this small scale, we can end up losing too much relief to the detail if we take that too far. I think I may switch back to Tamiya acrylic lacquers for the base coat, so that I have no need for a primer. That will save at least one layer.
|
| Modeling the Sherman Tank in 1/72nd Scale |