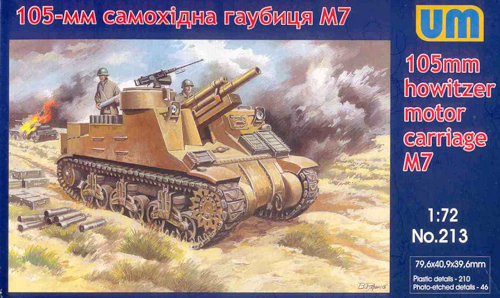
| 105mm HMC M7 | UM Kit #213 |
| Article by Stephen Brezinski; last updated 9 April 2016 | |
 |
|
| Modeling the Sherman Tank in 1/72nd Scale |
| 105mm HMC M7 | UM Kit #213 |
| Article by Stephen Brezinski; last updated 9 April 2016 | |
|
|
| The M7 Howitzer Motor
Carriage (M7 HMC) was an attempt to bring the support of
the field artillery closer to the front lines and to make
for faster deployment. The 105-mm howitzer was a common
weapon and standard in the US, Italian and German armies;
the UK went with the 25-Pounder (95-mm) and the USSR with
the 122-mm howitzer. The M7 was the initial version of
this HMC and was based on the M3 Medium tank with the
3-piece bolted differential housing and early Vertical
Volute Spring Suspension (VVSS) bogies and the return
roller over the springs, no track skid. The M7B1 was the
later variant that was based on the M4A3 Sherman and was
built with the heavy duty VVSS bogies among other
upgrades. Let's take a look at the box art to see what is supposed to be inside the box, and to get an idea of what the M7 HMC was supposed to look like. Starting at the top we see the pulpit-like machine gun cupola from where the M7 'Priest' get its name from. The 50 caliber could be moved around the pulpit rail to point in any direction. On the front we have the headlights and brush guards on the upper superstructure rather than on the lower glacis area like on the M3 and M4 tanks. Lower down are three storage boxes for spare track and grousers. Being based on the M3 Medium tank this early M7 variant has the 3-piece bolted differential housing and the Continental radial gasoline engine. The Vertical Volute Spring Suspension (VVSS) is the early type like that on the M3, with the return rollers directly over the springs. The roadwheels are the cast 5-spoke style. The track appears to be the T54 steel chevron track, the chevrons look too narrow to me to be the T48 rubber chevron tracks. The later M7B1 HMC would have the heavier duty VVSS bogies with the track skid and be based on the M4A3 Sherman with the GMC gasoline engine. The Parts On the box cover it states that the kit contains 210 plastic parts and 46 photo etched metal parts; I counted about 165 green colored, injection-molded styrene plastic parts actually used for the model, and about 27 etched metal parts. You'll notice I did not use the common term "etched brass" as I am not sure this metal that UM uses is brass. Like in many UM Sherman kits, there are bunches of extra, leftover parts. The large number of parts for such a small model is largely due to the many link & length hard plastic track parts. There are also over 100 extra, unused parts, including a complete set of VVSS bogies. The parts are decently molded and always seems to come a medium green colored styrene. Part quality and accuracy are decent but not the crispness and fine detail of a Heller or Dragon Sherman. Not all the kit sprues, such as Sprues A and B are shown below as they are the same sprues as in UM's M4 Sherman kits already reviewed in other articles.
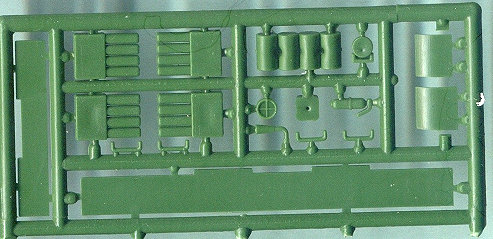
Sprue C above holds assorted parts such as the gun and driver compartment floors (18C and 20C) at the left and other interior parts. Parts I marked with an X are unused parts for other UM kits. At far left is the ring for the machine gun pulpit (part 23C).
Sprue E/D: this sprue is labeled Sprue-E on the sprue but in the kit instructions it is referred to as Sprue-D On this sprue we can see some annoying sink holes on parts 9D, 6D and others. There are two of these sprue and some of the parts will be extras, so are unused.
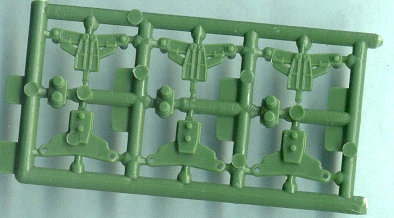
Sprue G: This little sprue is actually part of the larger sprue H/G below with the extra parts cut off. This sprue holds parts 24G, 25G and 26G for the early type VVSS bogies with the return roller mounted directly over the springs, no track skid. This is the first UM kit I know of that has these parts. The VVSS bogies are decently done but does not have the detail and sharp molding as the Mirage M3 Medium tank VVSS bogie parts.
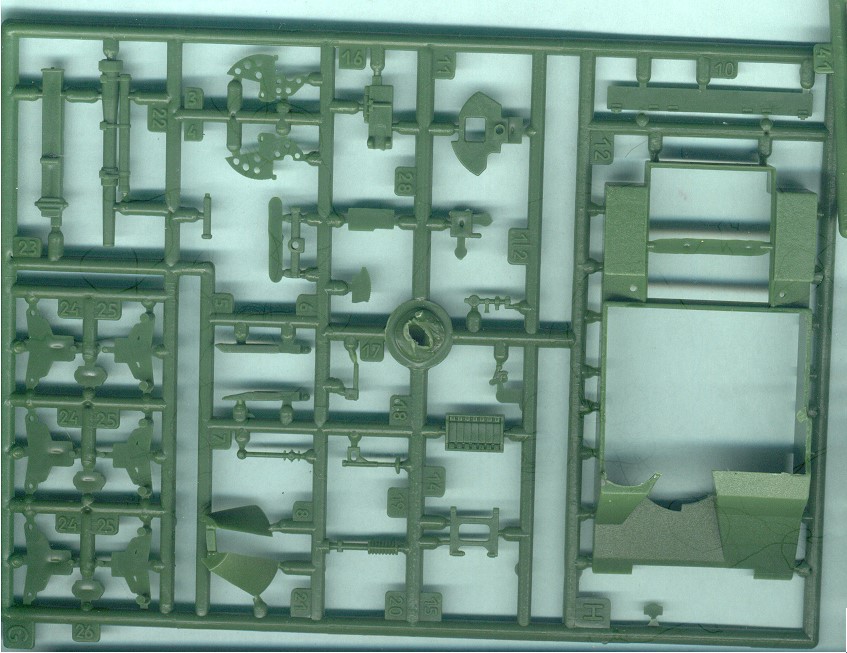
Above is the complete Sprue G at left and center, and the Sprue H at right holding the upper M7 HMC superstructure. The sidewalls of the superstructure are a little too thick for the scale which is normal for the an open top AFV such as this; the sidewalls could potentially be replaced by thin plastic card maybe. I doubt think this kit will ever see an aftermarket etched brass upper hull. In the center and upper left of Sprue G are the parts for the 105-mm howitzer (105-mm M2A1 (M101A1) howitzer) including the gun barrel and recoil system on parts 22G and 23G. At lower left is the second set of parts for the initial style VVSS bogies.
Sprue K holds the engine deck (part 36K) and the engine compartment wall (34K), the rectangular holes in the engine deck are covered by etched metal screens (parts 1F and 4F). Parts 28K, 29K and 31 K are unused parts. At lower right is the lower ring for the machine gun cupola (part 45K). Kit Instructions The instructions look good but like other kits with many parts, pay close attention to placement of the small parts. Assembly of the VVSS bogie parts are similar to that in the other UM M4 kits already reviewed elsewhere so I did not bother to show them here. Unfortunately the kit's 3-piece bolted housing parts on Sprue E are also the same as in UM's earlier M4 releases and I curse it! Please, some small resin aftermarket kit producer should make a nice resin replacement for this differential housing! The kit engineer that designed this UM subassembly (see Step-2) obviously never tried to build the model?
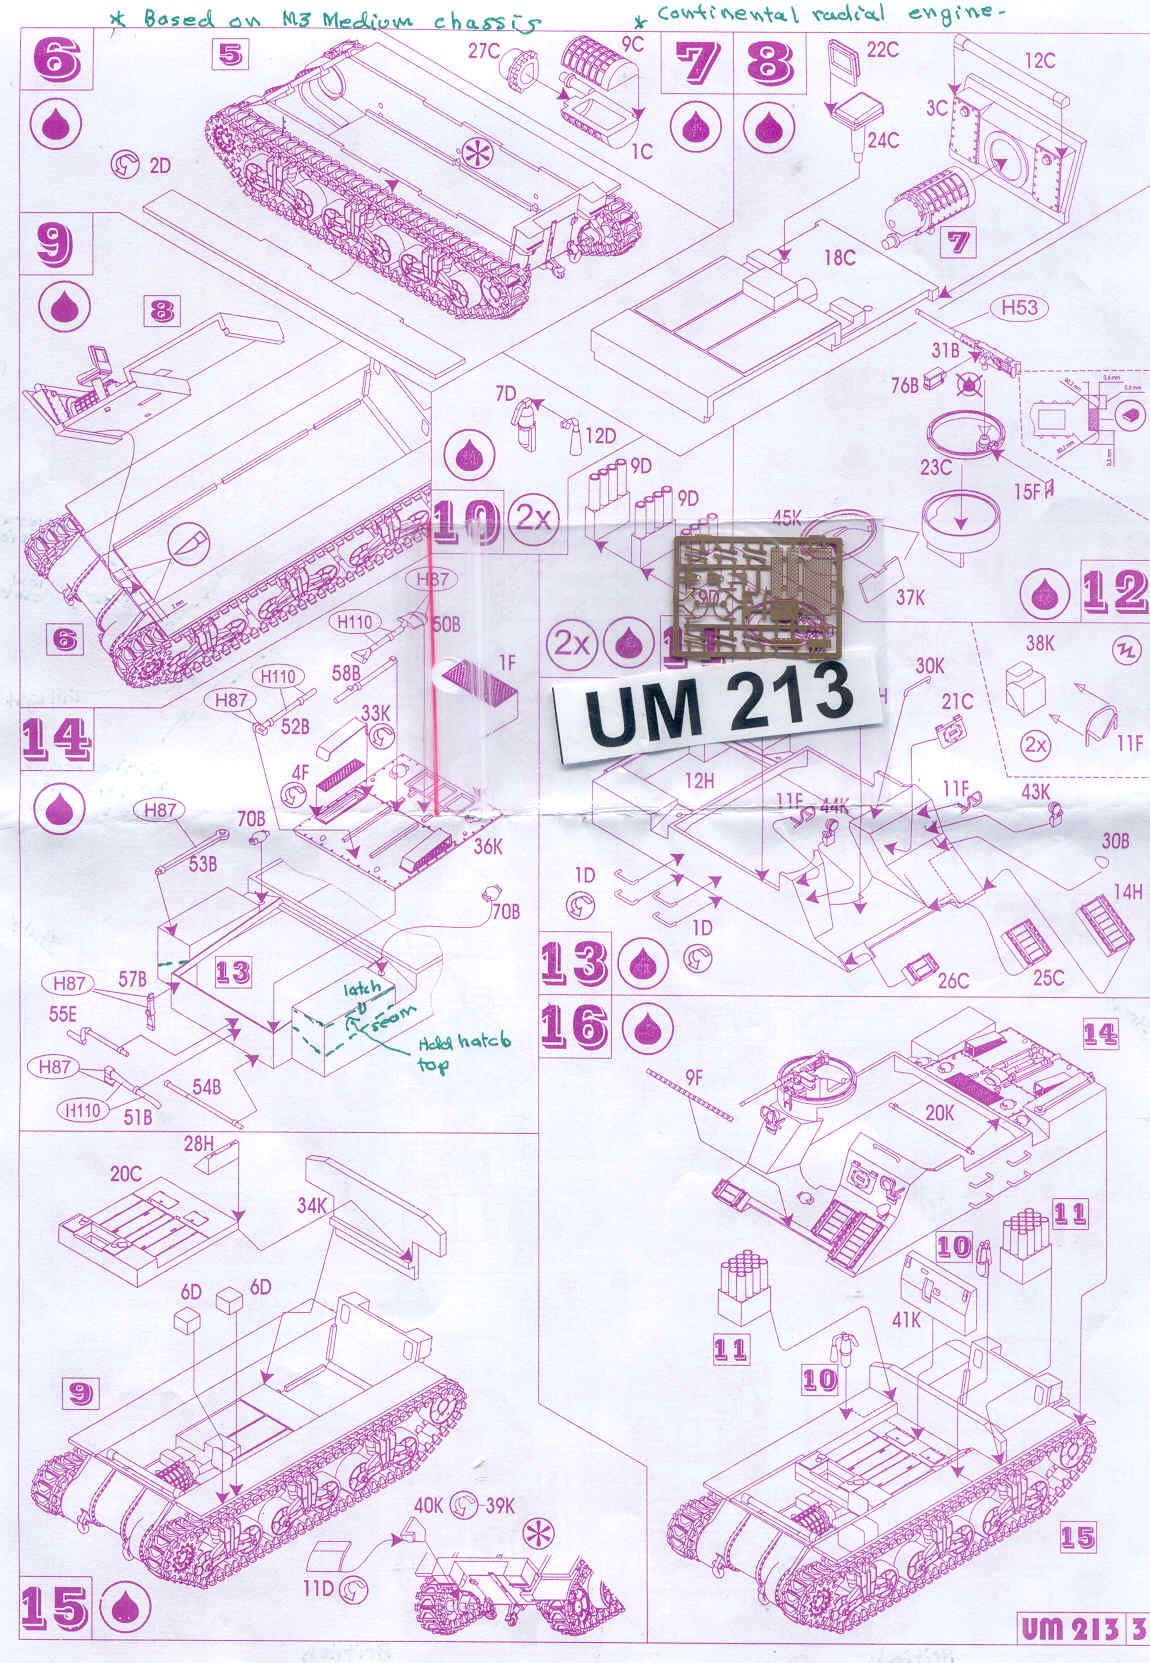
The kit instructions are the exploded view style used in other UM models and other model manufactures. What is interesting is that it is printed in purple ink. In the center we see the small etched metal sprue.
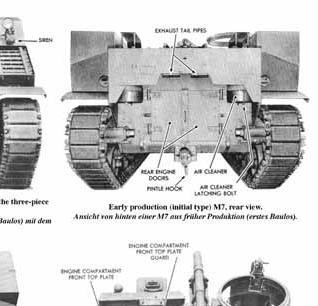
Steps 17 through 22 show assembly and installation of the howitzer from Sprue H. It is hard to see from the drawings in these instructions but there is something to be fixed on the rear engine plate of the superstructure. Step-14 and Step 22 show this location with handtools mounted on the rear plate. UM produces their M7 kit with the plate straight across on their part 12H, like on the M3 Medium tank, however this plate should be stepped up, not straight across. From my resources, it appears on only the prototypes and not the production models. Building a production M7 Priest or Kangaroo I recommend that the kit's rear plate be cut out to match our references. The reference photo below from the great Tankograd reference book listed below shows what the rear plate looks like on the production M7 Priest. We see how the rear plate is notched up in front of the air cleaners and engine doors, it appears for the exhaust tail pipes.
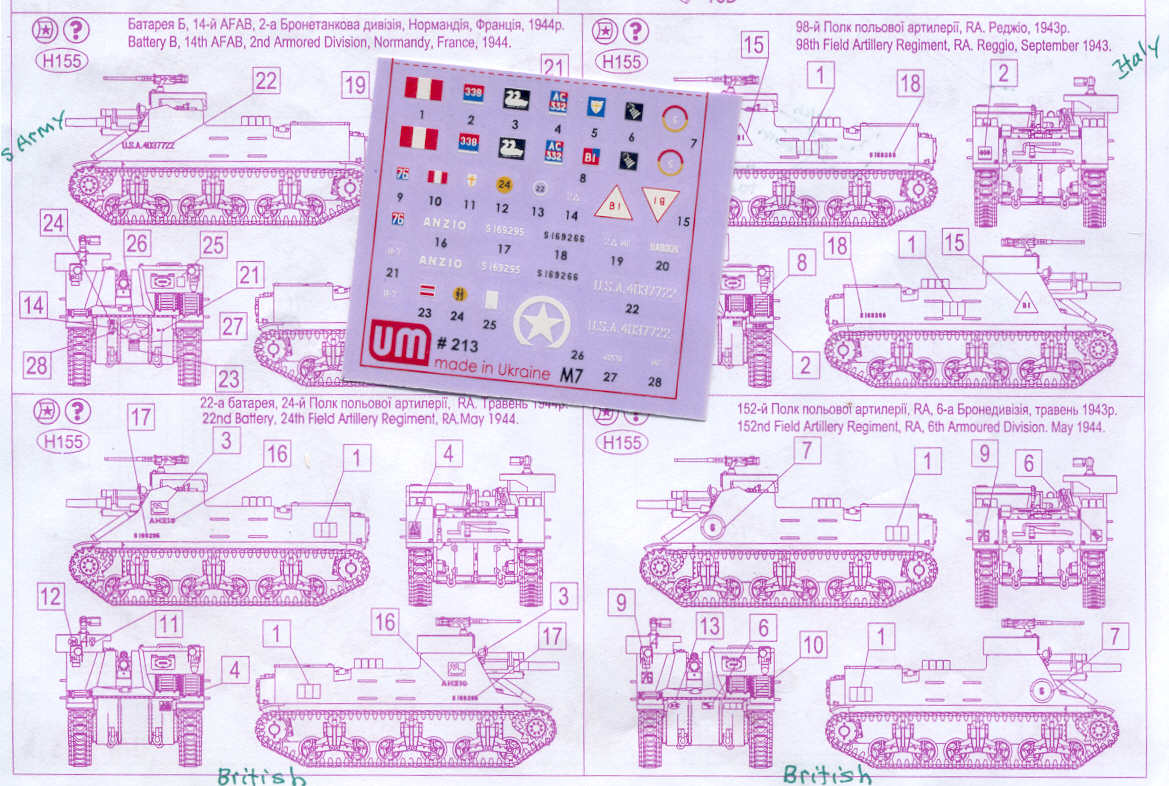
This last page of the assembly instructions show the four choices in markings: two US Army and two British Army. Other options for this model could be Israeli and Belgian Armies and with other nations, or as a Defrocked Priest or a Kangaroo armored personnel carrier.
The water slide decal markings look colorful and in register. Previous experience with the decals in UM model kits is that they apply well but can be stiff and a little brittle. You may need some strong decal setting solution. At the lower left corner of the decal sheet is the UM kit label handy for applying to the model display base.
Above is a photo I took long ago of an M7 Priest at Aberdeen Proving Ground, Maryland USA; unfortunately it appears I took only one photograph. We have a decent view of the gun and mount. I appreciate the details we can see on the AA machine gun mount for example. References U.S. Self-Propelled Guns in Action, Armor Number 38, by Jim Mesko, Squadron/Signal Publications (1999) M7 Priest Walk Around, by David Doyle, Squadron/Signal Publications (2009). The Sherman Design & Development, Son of Sherman, Volume 1, softcover or hardcover book by The Ampersand Group Inc. (2013) Sherman Minutia website http://the.shadock.free.fr/sherman_minutia/index.html US WW II 105mm HMC M7 & M7B1 Priest, publication No. 6007, Tankograd Technical Series Publishing, by Michael Franz. |
| Modeling the Sherman Tank in 1/72nd Scale |