| M4 to M4A2 "Emcha" Conversion | UM Kit #370 |
| Article by Stephen Brezinski; last updated: November 2012 | |
 |
|
| Modeling the Sherman Tank in 1/72nd Scale |
| M4 to M4A2 "Emcha" Conversion | UM Kit #370 |
| Article by Stephen Brezinski; last updated: November 2012 | |
|
|
| One of my pet
projects was to model a very early production diesel
engine M4A2(75) Medium tank (“75” indicating
armed with the 75-mm gun and smaller “low
bustle” or “high bustle” turret). The M4A2
never served in combat with the US Army but did serve as
a training vehicle in the United States and in combat
with the US Marines. Most M4A2s were shipped to the UK
and Soviet forces. Due to my fascination with combat on
the German-Soviet Front I’ve chosen to model this
Sherman in Soviet Service inspired by a photo in one of
my references of an early M4A2 with a mix of early and
heavy duty VVSS suspension bogies. The M4A2 actually
entered production before the M4 with the radial gasoline
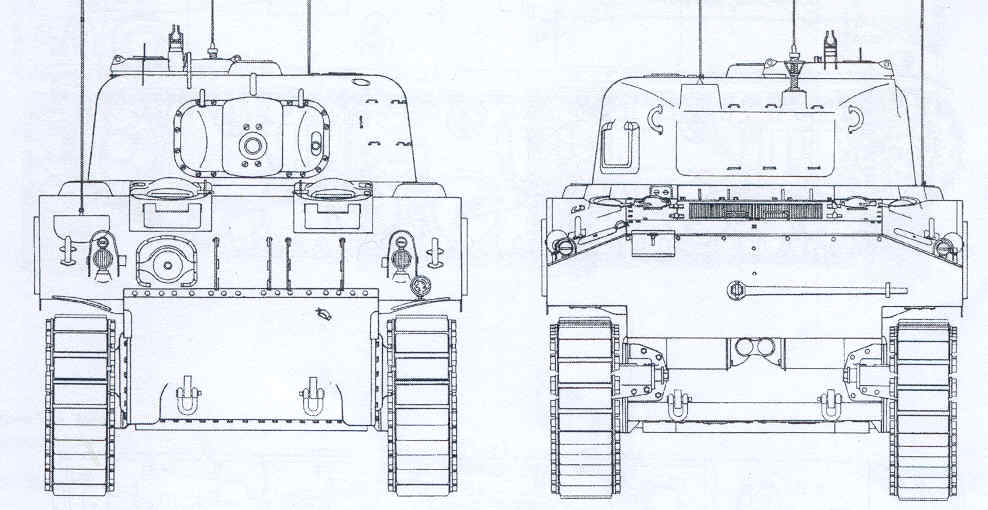
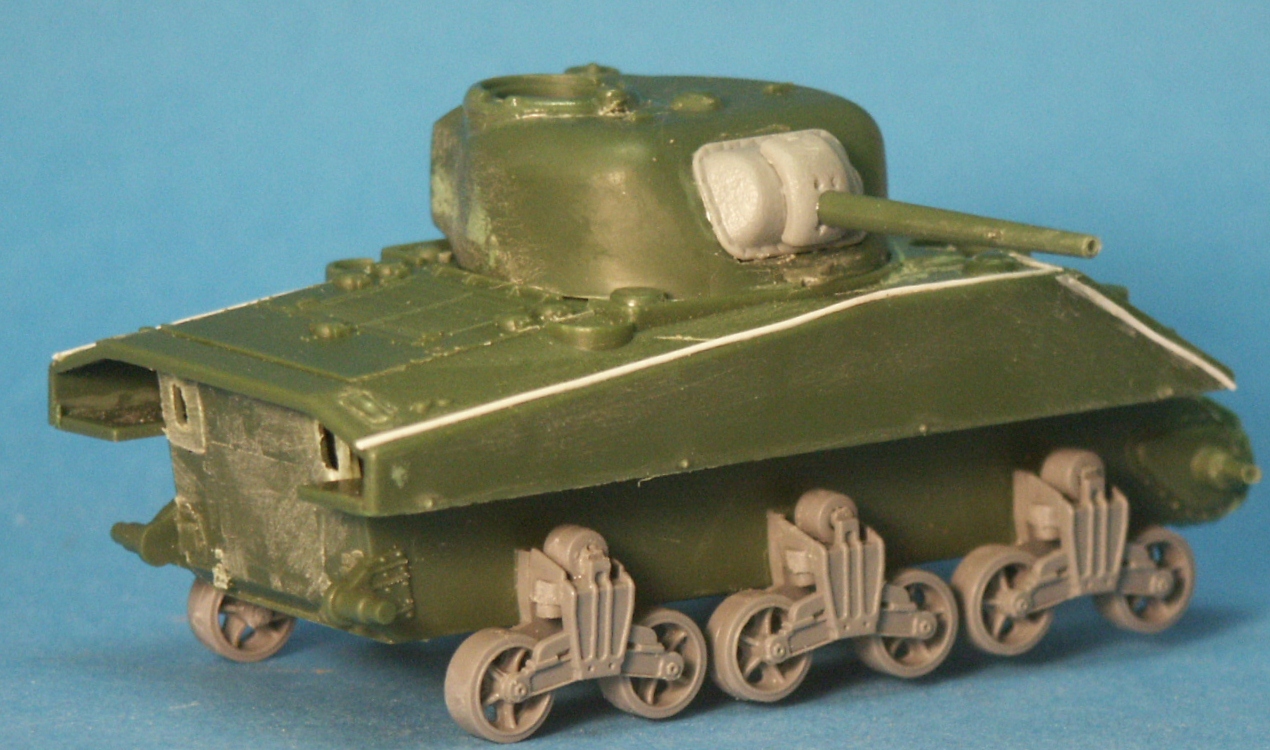
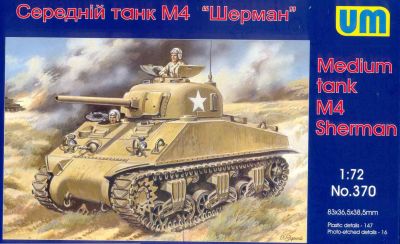
(petrol) engine. What are the characteristics of an early M4A2 Sherman? The M4A2 had a welded hull very similar to that of the M4. The early M4 and M4A2(75) would have the direct vision (DV) viewports on the front of the hoods in front of the driver and co-driver positions, and no second periscope in front of the hatch. The initial M4A2 would have the vertical volute spring suspension (VVSS) bogies with no skid and the return roller mounted directly over the bogie, as seen on the M3 Medium tank. On the turret the early M4 had the simple M34 main gun mantlet and the split hatch commander turret; no loader hatch or all-round vision cupola. The initial M4A2 would more than likely use the T41 type track with the plain rubber track block. I chose to use the UM M4 kit #370 for this conversion. Why the UM model rather than the better Dragon kit? Unless I wanted to buy an expensive resin hull the UM was the only kit easily available with direct vision hoods. A Look at the Box Art From the bow, the M4A2 looks very similar to the M4, both have welded hulls for start. On the front of the driver’s hoods the direct vision (DV) viewports are evident though they are closed in this painting and I see the hatch periscope open. The driver’s periscopes are mounted in the hatch and are rotatable. DV hoods lack the additional periscope present on the later hoods without DV. The DV and lack of applique armor on the turret and hull sides imply an early production M4, though the one piece differential cover implies to me a mid-production M4(75). The wide M34A1 mantlet indicates a mid-late production M4(75). I suspect all these features are possible given how M4’s were repaired, upgraded and rebuilt. Requirements For Conversion to an Initial Production M4A2 I’ve found photos of initial production M4A2 Shermans but not in Soviet service. I have found one Soviet M4A2 with features of an early M4A2 such as M34 gun mount and a strange mix or early and heavy duty VVSS bogies. My model will unfortunately have to be a representative Soviet Emcha as how I imagine one would look like.
Using the UM kit:
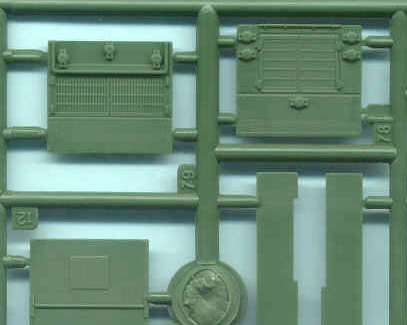
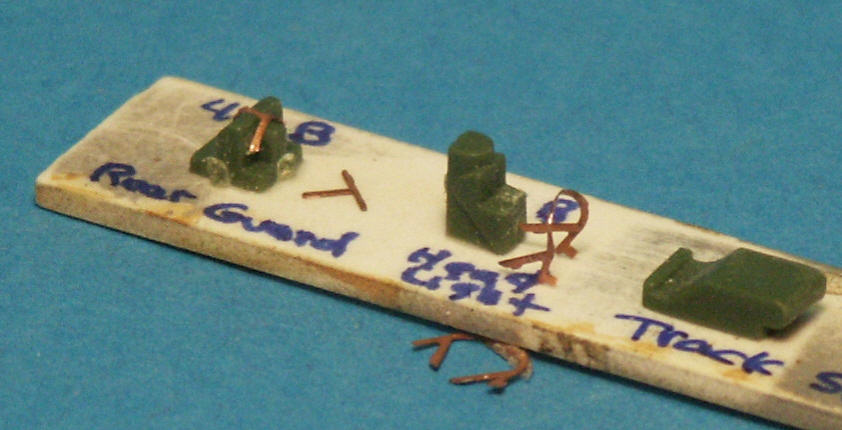
1. Replace the M4 engine deck with an M4A2 engine deck. Fortunately the UM Shermans are modular kits and an M4A2 engine deck is included. In the above photo from the UM M4(75) kit is the UM M4A2 engine deck (part-78B) at upper right, to its left is a spare M4A3 engine deck (part 79B). A little sanding and test fitting is needed I found. 2. The oil filler cap in the center of the engine deck (part-78) just aft of the ventilation grate should be shaved off. (I notice some sink holes in many of the oil filler caps.) 3. Modify the rear upper armor plate to that similar to the M4A2 using either references drawings or a good 1/72 scale model kit like Dragon. 4. Modify the lower rear plate by shaving and sanding off the engine-access doors and other non-M4A2 features; more on this below. 5. Find a 1/72-scale 3-part bolted differential cover, like that used on the M3 Medium tank and graft it into the glacis and lower hull. (This differential housing can be found as an extra in some Dragon Shermans, and in the UM M4A4 kit.) 6. The turret will have the initial production M34 rotor shield (gun mantlet) without the little wings on the side, and the single hatch on the roof with split hatch. 7. For a very early M4A2(75) production we’ll need some early M3-type VVSS bogies with the open 5-spoke roadwheels. UM supplies the heavy duty VVSS bogies with trailing return rollers, and incorrect open 6-spoke roadwheels so both of these will have to be replaced.
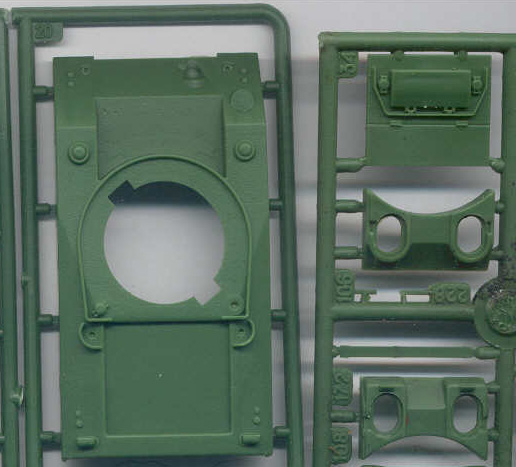
8. This photo shows the modular M4 Sherman welded-hull with the M4 engine deck (part-34) at upper right. Below the M4 engine deck is the modular, drop-in, DV driver’s hoods (part-106) at right center, and an optional non-DV cast driver’s hoods (part-108). I’ve found the driver hatch parts will need some sanding and model putty for a good fit with no gaps. 9. The teardrop-shape grouser covers at the rear-top of the engine deck should be shaved down to look like an oval plate with a bolt in the center. 10. The mushroom-shaped ventilation domes on each side of the driver hatches look a little small but to me not worth replacing for this kit. Construction Begins
The Dragon 3-piece differential housing, five pieces all together, has been mated to the UM upper and lower hull using some sanding and filler. The drop-in driver hood area (part 106E) has been glued in after carefully sanding to fit and dry-fitting till it is just right. The UM driver’s hatches have poor inside detail and extra hatches from a Dragon kit are a little too small to use; so the driver’s hatches will be installed closed.
It does not appear to be common knowledge outside Sherman fans but early Shermans had a glacis made of many smaller plates and cast or welded hoods and hatch areas that were all welded together; this was very labor intensive. These weld seams I have replicated with strips of thin .010 styrene. On other kits I have replicated weld beads with fine thread or scribing a line in the plastic, at the end we’ll see if this is a successful technique. Looking at real M4’s I’ve found Sherman weld beads were very smooth and clean so rough weld seams, particularly in this scale are unrealistic. UM provides a strip of etched brass (part 113F) to simulate the row of bolts affixing the differential housing to the upper hull. At first I thought little of this technique but after using it I think the row of bolts look fine.
A good view of the excellent M3 bogies from a Mirage M3 Lee or Grant kit. When switching bogies between kits like this make sure they will align with and be at the same height of the sprocket and idler wheels.
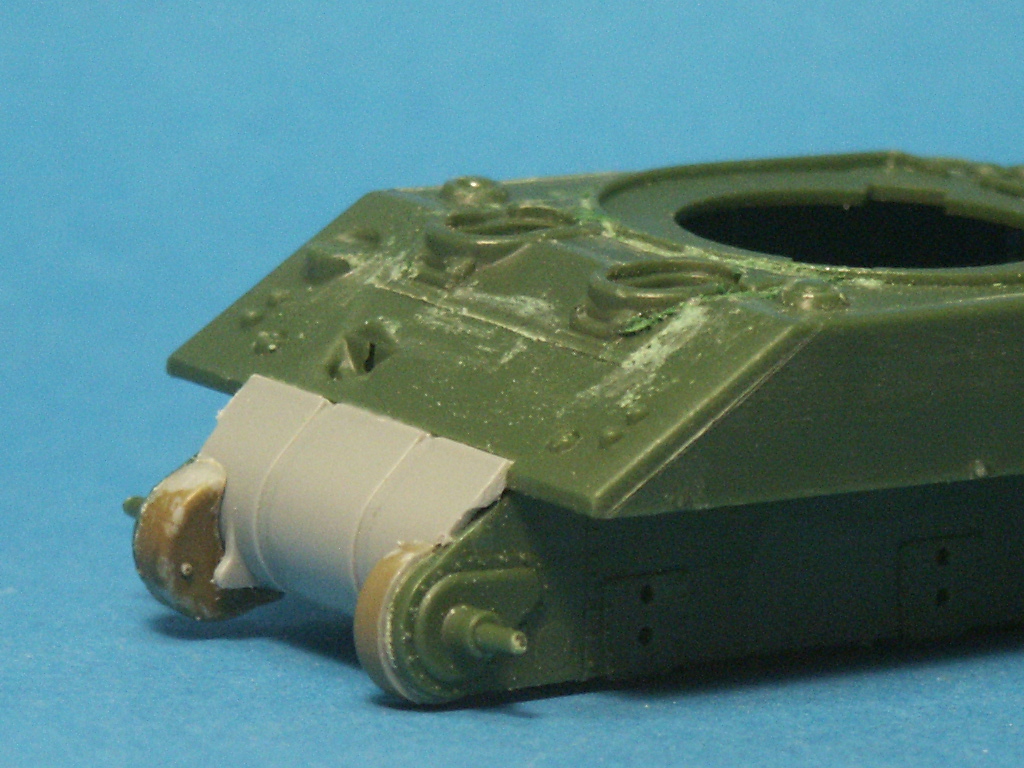
During a test fit of the tracks I found that the bogies sat too low and close to the hull in relation to the idler and sprocket wheels so I removed them all. This photo shows the white filets of styrene plastic glued to the back of the Mirage kit bogies to move the roadwheels further out from the hull. The bottom braces on the back of the bogies were also cut down thinner so the bogies can be mounted higher. In this photo, above the track, is a strip of thick styrene strip to act as a guide for the bogie height.
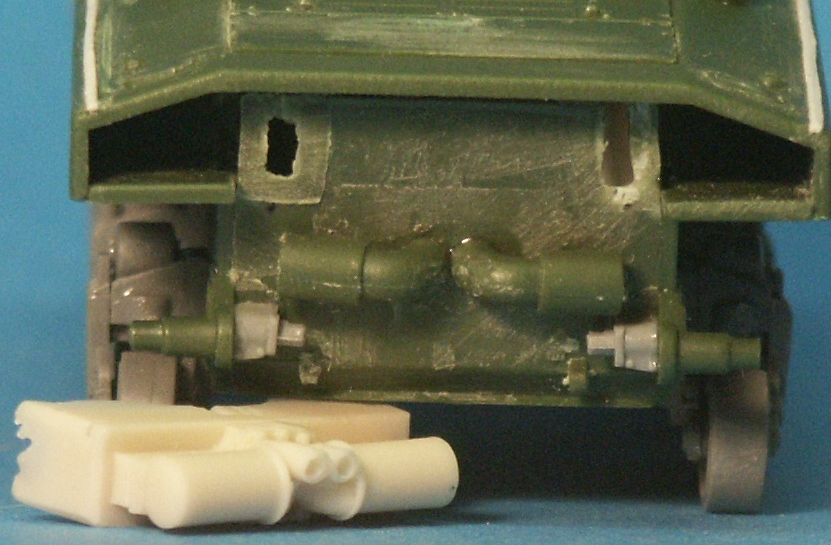
This view of the rear prior to affixing the rear upper hull plate. The lower hull rear plate was originally for the M4 kit so the rectangular air filters were cut off and the engine access door was shaved and sanded off, the M4A2 rear plate had no doors. This photo shows what UM gives us as the M4A2 engine mufflers and exhausts, parts 87. What the M4A2 mufflers and exhausts should look like is the fine resin muffler piece from a MR Models M4A2 kit at lower left. UM hasn’t even come close to getting this feature right! I’d love to know how they got the idea that the M4A2 exhaust looked like this above.
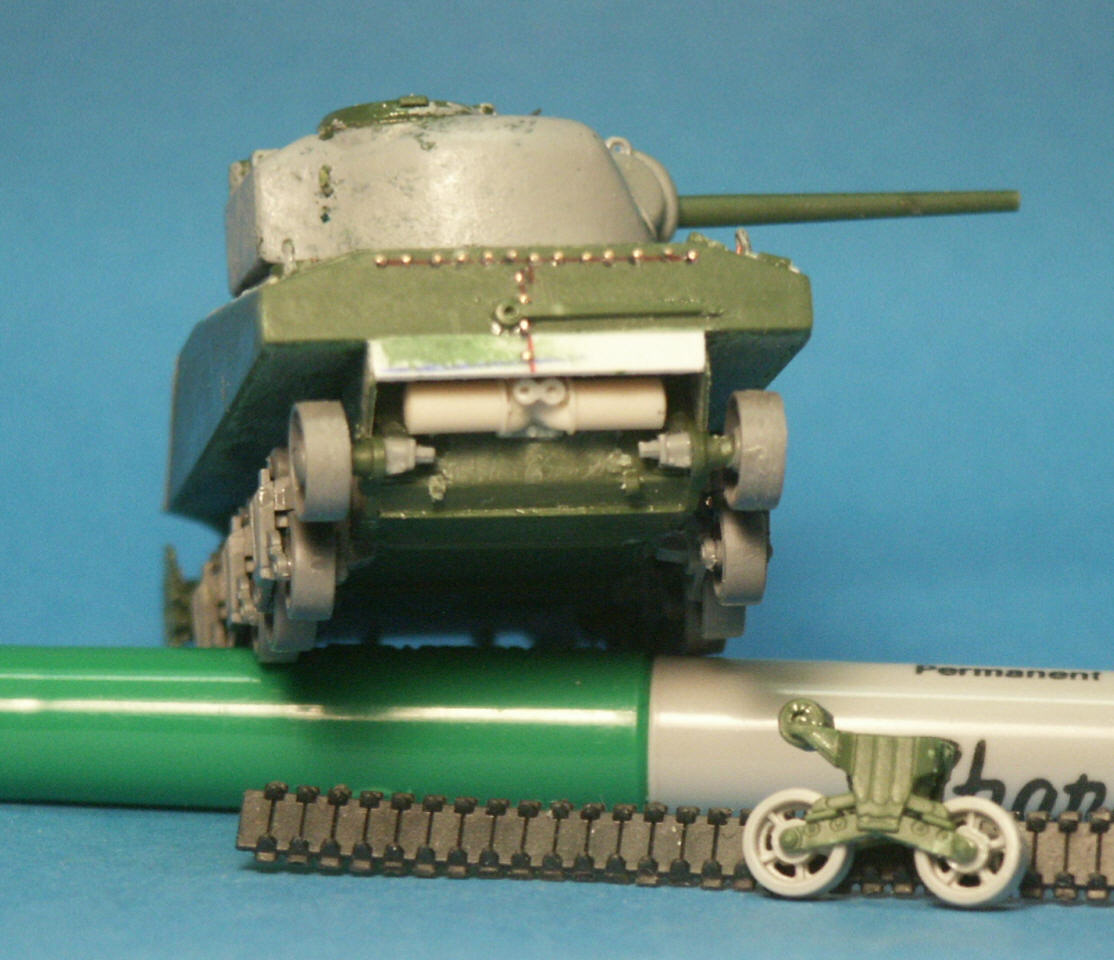
The section of sheet styrene has been added to the kit’s M4 plate to make it an M4A2 rear plate and the MR Models muffler has been installed. Along the top and center of the rear upper-hull plate rows of bolts have been replicated with copper wire. The early M4A2 had 11 horizontal bolts, later changed to seven bolts. I mistakenly put on 13 horizontal bolts; oooops, not my finest efforts in detailing a model! At lower right is a UM VVSS bogie still lacking the etched brass track skid, and the T-41 band track from a Mirage M3 Medium kit.
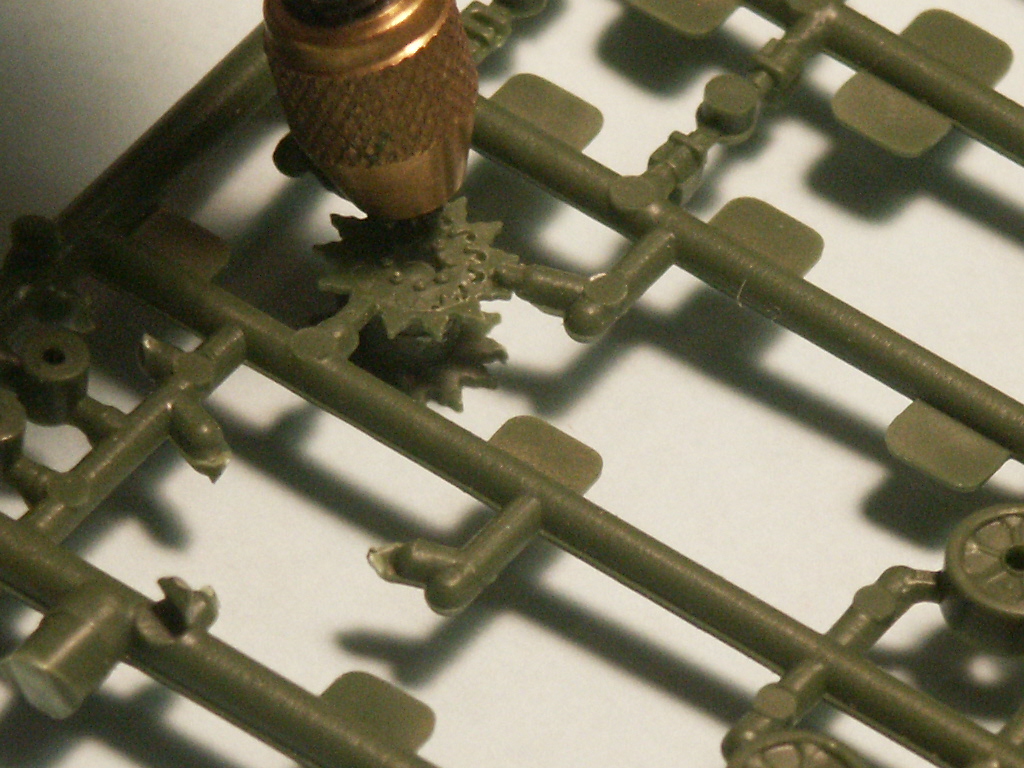
The UM “fancy” type sprockets are decently designed and reasonably accurate. There is a missing row of openings around the sprocket that I replicated with a fine drill.
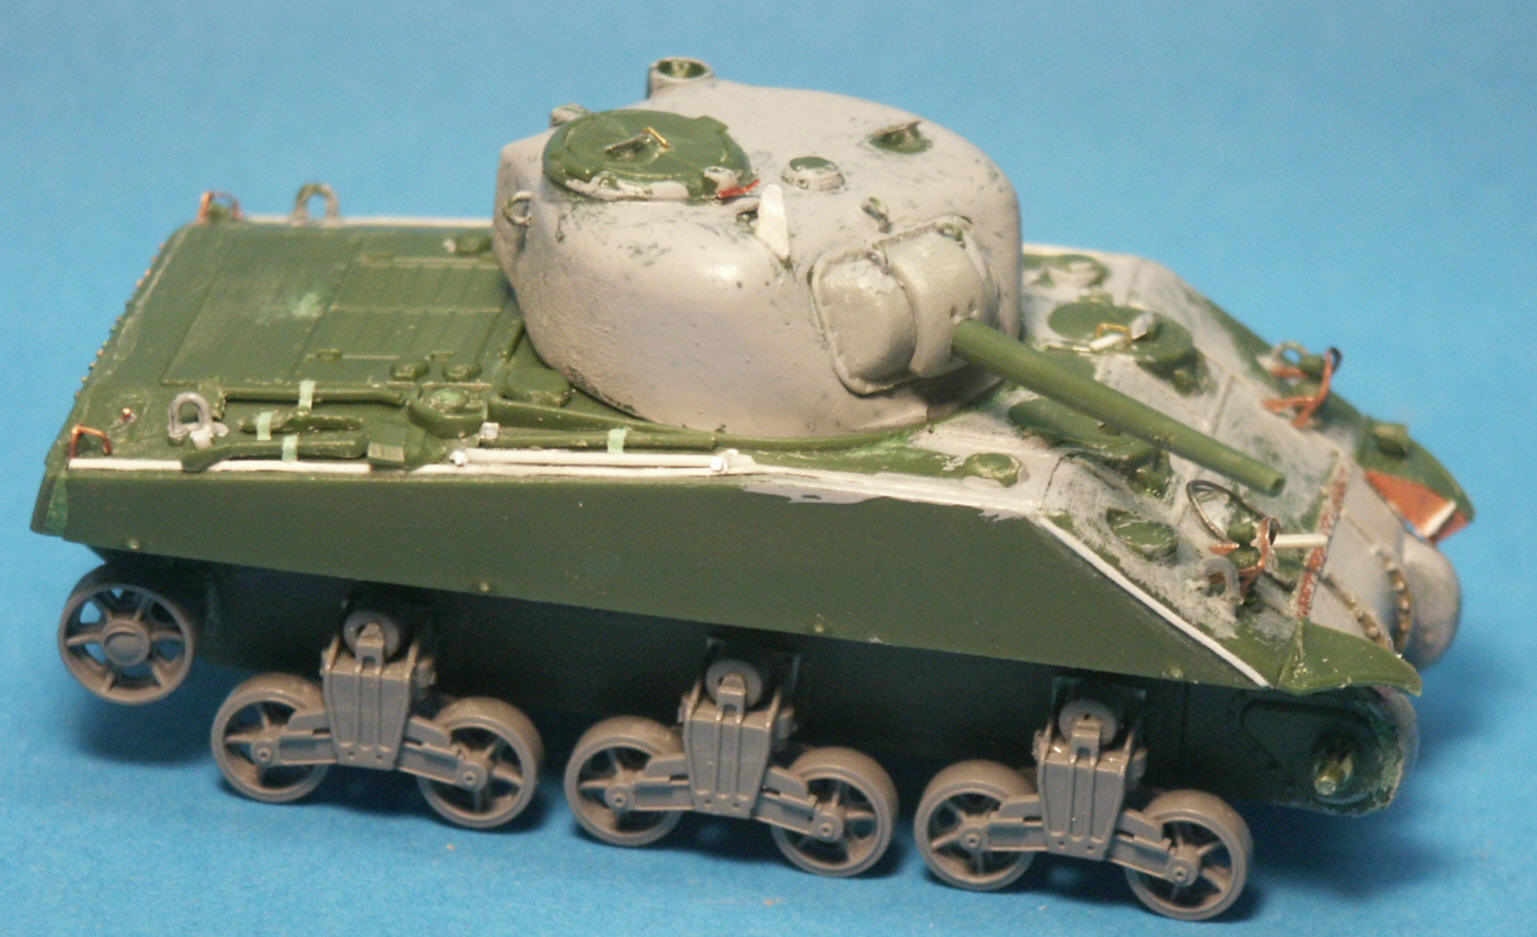
The fit of the Dragon gun mount and mantlet onto the UM turret is very good. The turret has been given a coat of Mr. Surfacer 1000 to blend the parts in and give it a slight cast texture. The early VVSS bogies and idler wheels taken from a Mirage kit M3 Lee now attached. It is critically important that we make sure the roadwheels align with the sprocket and idler wheels, and that there is enough room for the track to fit and not rub against the hull. In this photo I can see that the return rollers are too low in relation to the sprocket and idler wheels. The etched brass fender pieces (part-108F & 109F) have been glued to the front fender (part-4C & 16C ) and then attached to the model. The lower end of the brass fender brace rests on the differential with a small gap between the fender brace and the curve of the differential, based on a historical photo this is actually accurate.
On their Sprue-B, UM gives little templates (parts 42B, 46B and 69B) to bend their brass brushguards and track skids. I glued the templates to a strip of styrene to make them more steady and easier to use. After doing one brass part I got used to using them and found the templates a great help in making all these brass pieces consistent in shape. UM’s brass parts are not as shiny and nice looking as that produced by Eduard and Part but is more than adequate for this scale.
Etched brass parts around the lights added, tie-down straps for the handtools, and a vane sight in front of the commander’s hatch are added. Early Shermans such as this did not have the wire periscope guards. Painting & Markings
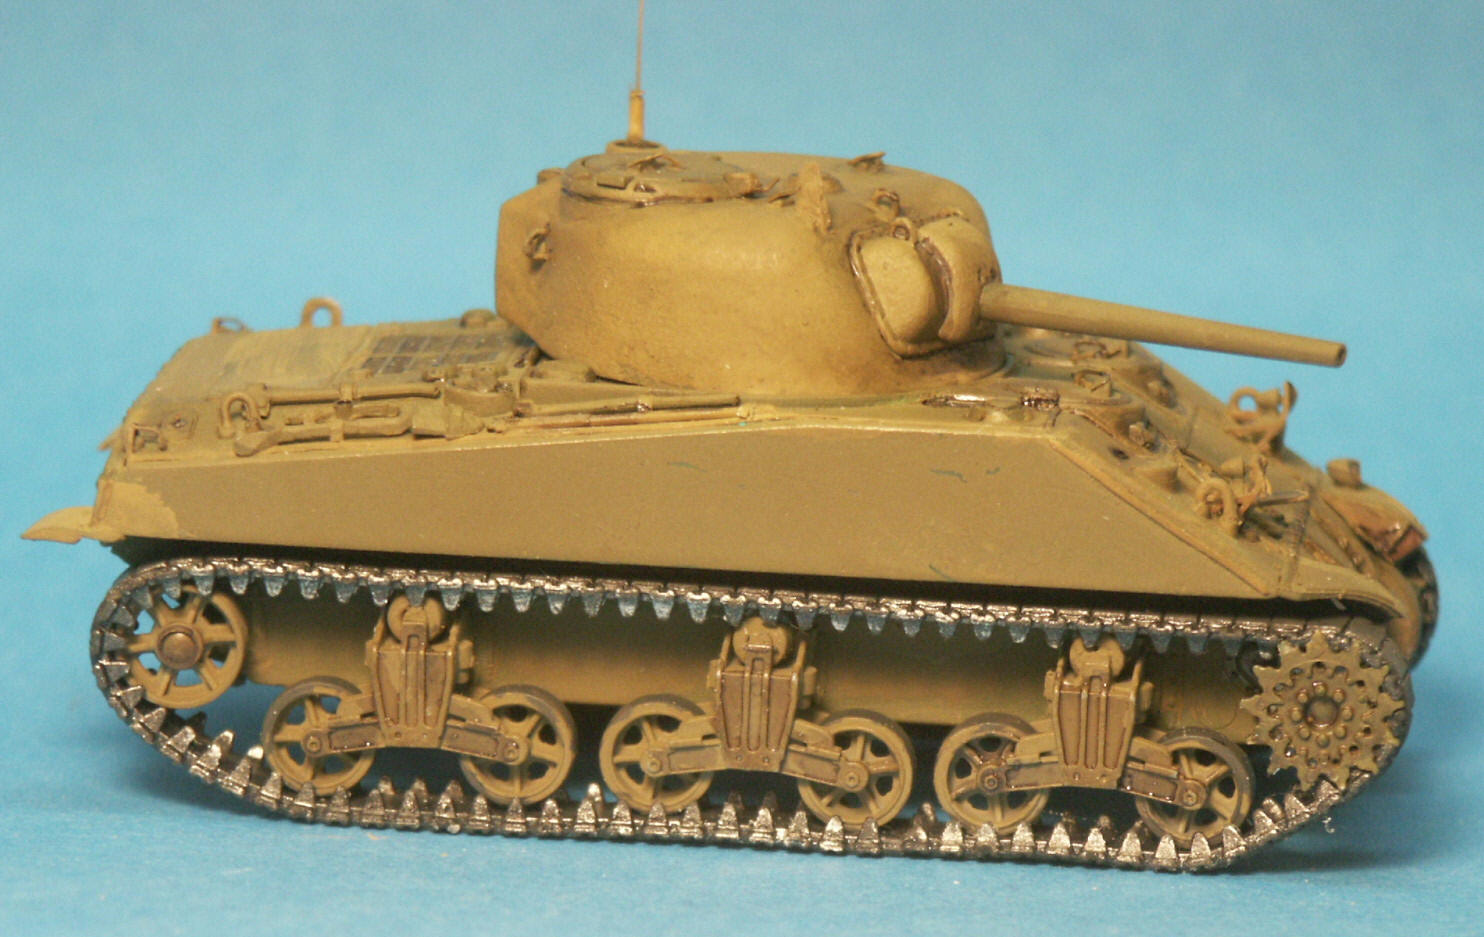
After assembly a base coat of olive drab (OD) is applied over the tank and then a wash of water-based brown and black applied in recesses. Excess wash will be blended in or removed with a damp paint brush (we cannot do that with oil-based washes). At the rear (left) is a small area that had to be re-puttied and re-painted. After painting the roadwheels Poly-S Grimy Black (or dark gray) color the soft plastic band tracks can be glued on. Remember this is “live” track so has little to no track sag. The rear idler wheel was all steel so was painted steel color and will later be touched up later with a graphite pencil.
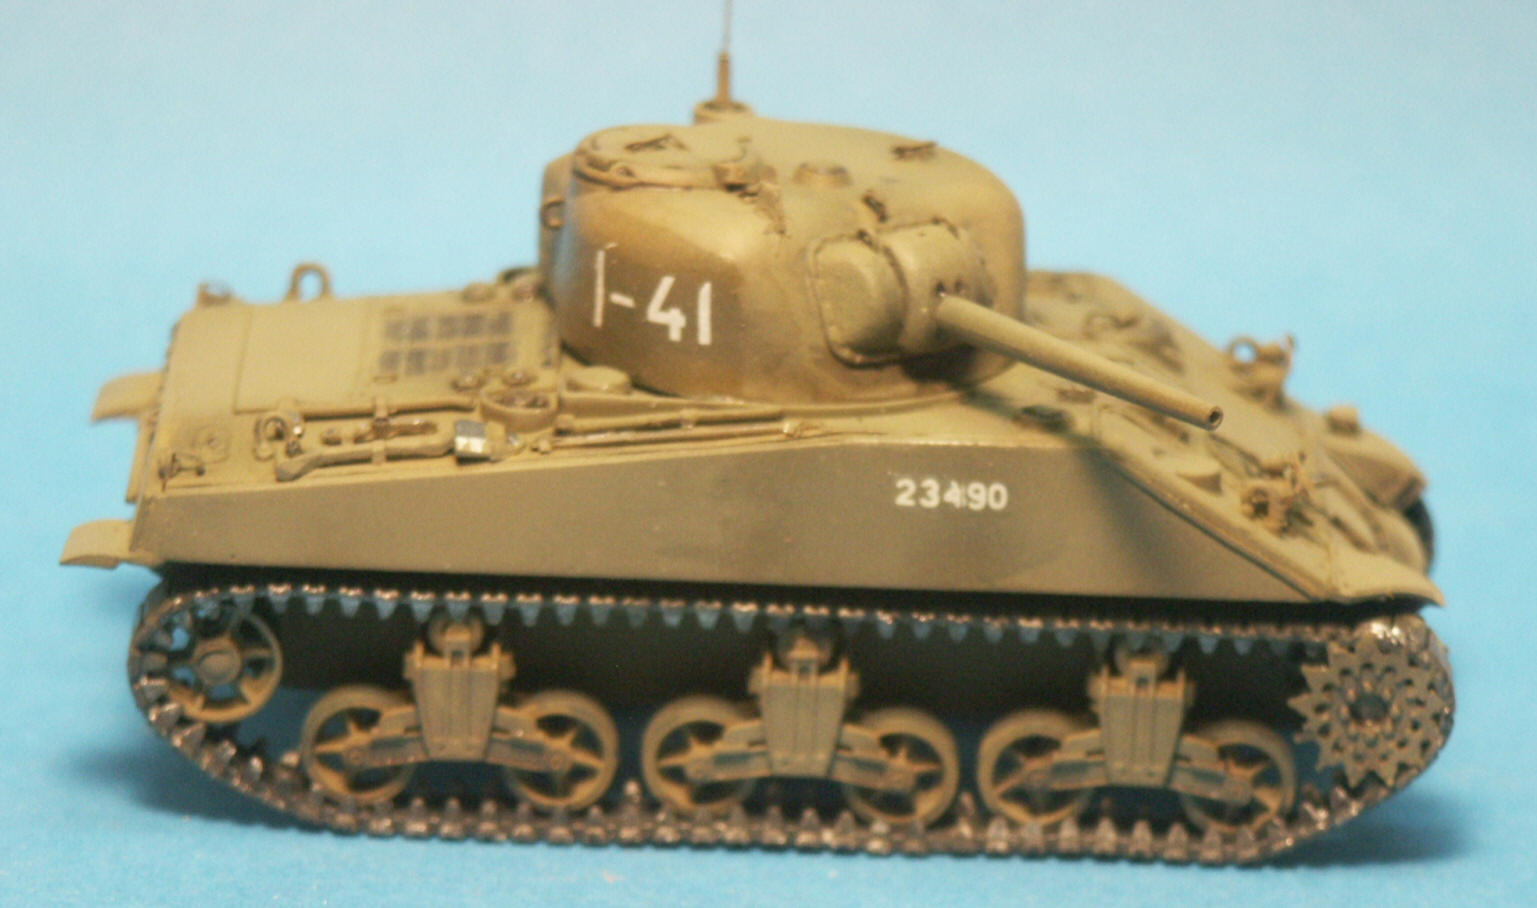
A lighter coat of OD was added to blend in the wash and cover any touched up areas. A clear acrylic coat has been applied to areas getting decal markings. The Soviet M4A2 tank I wish to model had large numbers on the turret and a serial number on the forward hull side. Acrylic clear gloss has been added to the turret side as a base for the water slide decals to inhibit silvering of the decals. I found no markings for this particular Soviet unit or tank so found some generic white numbers.
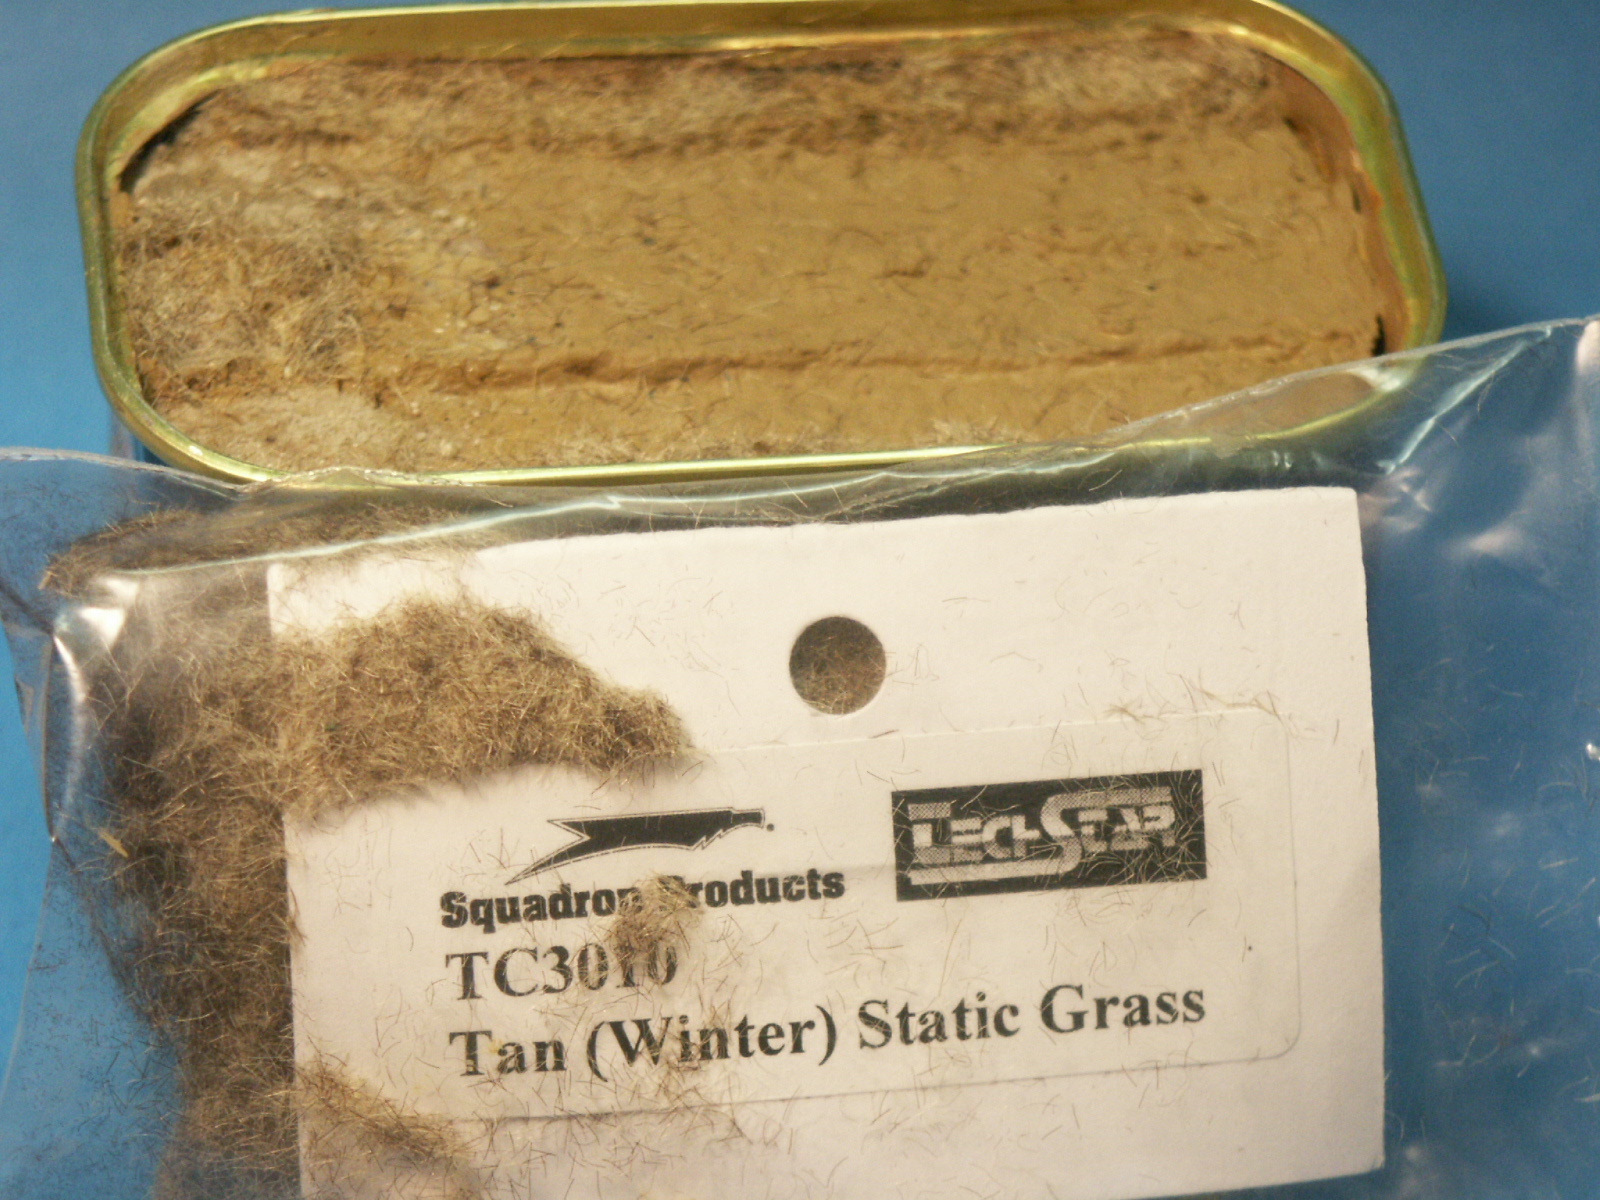
For a model display I built up the interior of a small tin can with foam then added a layer of Celluclay instant paper mache' to simulate groundwork. After painting the ground, Static Grass was affixed with white glue.
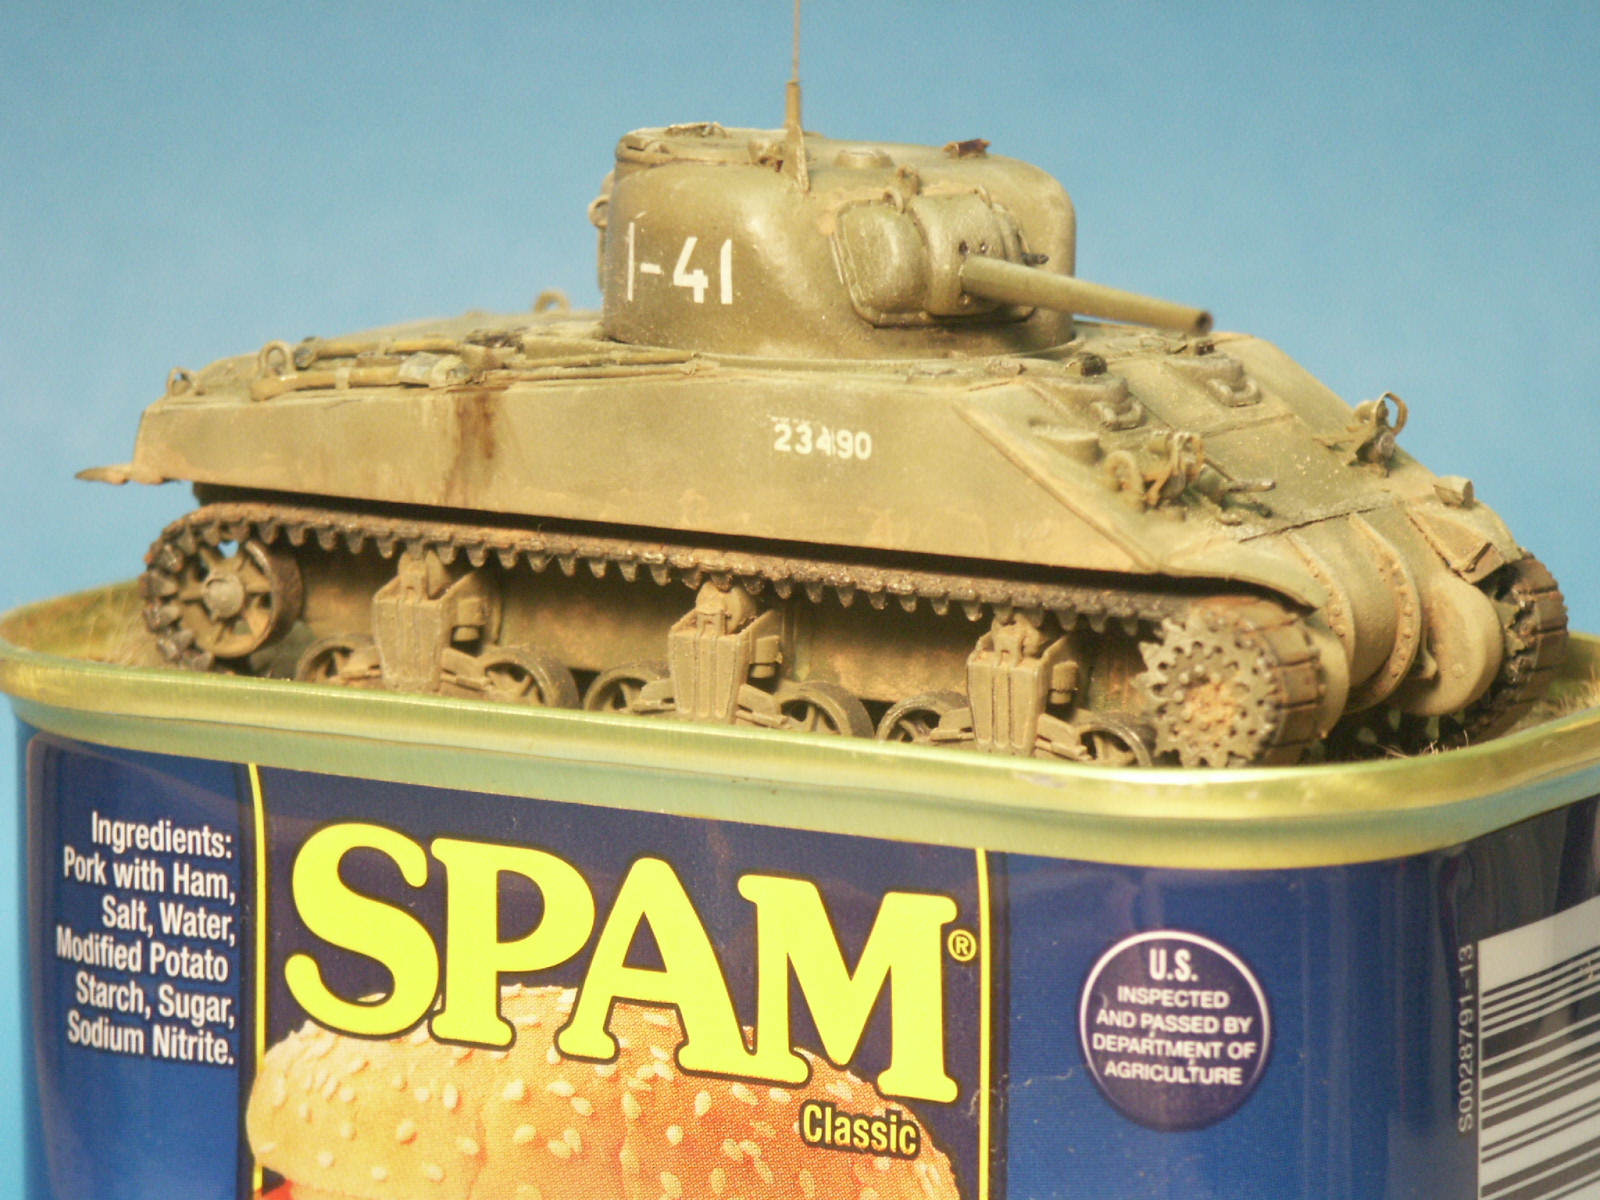
I titled my model display LEND LEASE. In addition to the 4000 or so M4 “Emchas”, thousands of aircraft and millions of tons of food, fuel and material shipped to the USSR, thousands of tons of SPAM canned meat was also received. Considering this, combining the two (the can and the Lend Lease Sherman) together made a fitting display.
An acrylic flat coat was sprayed to give a consistent appearance. The model was highlighted with Tamiya Weathering Master. Earth tone paint pigment powder is used for a dusty coating. Representing an initial production M4A2 the tank comes with the early VVSS bogies, direct vision viewports for the drivers, no applique armor plates on the turret of hull sides, and the flat rubber block track. Conclusions The UM Shermans will need more skill and work to bring them up to a contest winning miniature reproduction. Converting it from an M4 to an M4A2 will complicate assembly but also give opportunity to replace parts with all those nice extras common to a lot of Dragon Sherman kits. As fate and Murphy's Law would have it, just after I completed this model I was sent an excellent resin conversion of this hull based on the admirable DML M4A2 kit. References M4A2 Sherman, Part 1, by Wojciech J. Gawrych, Armor Photogallery #11. Model Centrum Progres, Warsaw, Poland. This is one of the best books available for explaining and detailing a small-hatch M4A2, all in English language. Sherman Minutia website This is the best on-line reference for the details of the Sherman tank variants; not as much of vehicle combat history though. http://the.shadock.free.fr/sherman_minutia/index.html Comrade Emcha, Red Army Shermans of WW2, by Claude Gillono with Leife Hulbert, The Oliver Publishing Group (2011). ISBN 978-0-9806593-7-5 Modeling The Sherman in 1/72 scale website. http://www.172shermans.com/sherman_M4A2_list.htm |
| Modeling the Sherman Tank in 1/72nd Scale |