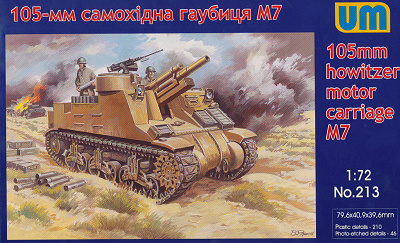
| 105mm HMC M7 | UM Kit #213 |
| Article by Doug Chaltry; last updated 3 December 2017 | |
 |
|
| Modeling the Sherman Tank in 1/72nd Scale |
| 105mm HMC M7 | UM Kit #213 |
| Article by Doug Chaltry; last updated 3 December 2017 | |
 |
|
| Stephen Brezinski had previously reviewed this UM M7 Priest kit, and I highly recommend you all
check out that article. I don't want to repeat any of his
useful information here, so instead, this article will
simply fill in a few blanks, and then spend some time
elucidating the differences between the M7 and the M7B1
Priests. First, here is a complete list of all the sprues included in the kit (Stephen showed only the new parts). Note that my sample, which was purchased in late 2017, includes a cast resin final drive housing. Stephen's kit did not include this piece, and in fact, he was highly critical of the plastic parts included in the kit for this housing. The plastic 3-piece nose has been included in many of UM's earlier Sherman kits, and many people have expressed frustration with assembly of those parts, so I wonder if UM will include this resin nose piece in all future releases of their early Sherman kits as well?
Decals are included for four vehicles:
M7 vs M7B1 Regarding the different versions of the Priest, there was a lot of overlap between the M7 and M7B1 Priests when it comes to final drive housings, the .50cal mg pulpit, wheel suspension units, etc. The key difference to tell apart the versions is the rear hull and engine deck. Since the M7 was converted from the M3 medium tank, and the M7B1 was converted from the M4A3 Sherman, they were powered by different engines, and therefore the rear part of the hull differed considerably. Final Drive Housing While it is true that the M7B1 was equipped with only the late version, "sharp-nosed" final drive housing, many of the late M7s had that piece as well. The M7 production began with the 3-piece bolted nose, with the righthand piece having a step in the top as a holdover from the M3 Medium, which needed that step to accomodate the 75mm cannon. The M7 then switched over to the single-piece rounded nose, but due to mechanical problems, then switched back again to the 3-piece nose, with no step in the righthand piece. Final production M7s were equipped with the sharp-nosed housing. The UM M7B1 kit [correctly] comes with only the sharp-nosed piece, whereas the M7 kit includes both, which is a nice option to have. .50cal MG Pulpit The earliest M7s had a fairly shallow pulpit, but was later modified to have the curved side plate extended downward, providing a convenient place for the gunner to sit inside the pulpit. All M7B1s had the deeper pulpit. The M7 kit includes parts for only the early, shallow pulpit, thereby limiting us to the earliest examples of this version. It shouldn't be too hard to modify the kit to extend the pulpit downward. Wheel Suspension Units Early M7s mounted the early suspension units, the ones with the return roller mounted directly above the suspension bracket, and no track skid. Later vehicles switched to the heavy duty suspension units with the track skid and trailing return roller arm. All M7B1s mounted the heavy duty units. So again, this detail cannot be used to differentiate between versions. The UM M7 kit includes the early style suspension units, but the later, heavy-duty brackets are included as spare parts, giving the modeler the option to build a late vehicle, although there are no track return skids included and will need to be sourced from elsewhere. Side Armor Panels Folding armor panels were attached to the hull sides to better protect the ammunition in the ready racks above the sponsons. These were fitted to both mid- and late M7s and all M7B1s, but are included in only the M7B1 kit. Again, this limits the M7 kit to only early vehicles, though these parts should be easy to fabricate ourselves. Summary for M7 Kit The lack of side armor panels, extended machinegun pulpit, and track skids for the heavy-duty bogies limits us to building only very early representatives of the M7 right out of the box. This does, however, present a problem since the 3-piece nose in the kit is the later style, without the step in the right side. This is a detail that only purists will care about. Some fairly simple scratchbuilding or kit-swapping for the other details can result in being able to build a later example of an M7. Obtaining a single-piece, rounded final drive housing from another kit will also allow for building a mid-series production vehicle. |
| Modeling the Sherman Tank in 1/72nd Scale |