| "I'm
Game", Making a Wargaming Kit Into a Display Model Sometimes I really worry about my priorities, among other things. I have boxes of fine Sherman models from Dragon, MR Models and Heller, etc., but what do I choose build: an Armourfast and a Italeri M4A3(76) wargaming model, both kits loaded with simplicity. For additional, background information on these two small scale model kits please see Part 1 of this review. When assembling these kits into a display model we have to consider how far we wish to go in scratchbuilding and replacing parts. For example, both kits come with one-piece suspension parts with the wheels, VVSS bogies, and track all molded as one part. Do we use the part as is, do we mask the simplified detail by covering them with mud or snow, do we cut off the track and replace with a better quality track, or do we just replace all the suspension and track parts with separate better detailed parts? Additional problems with these kits are missing features, such as the handtools on the Armourfast model. Many features like lights, light guards, and lifting rings are simplified to just lumps and angular protrusions.
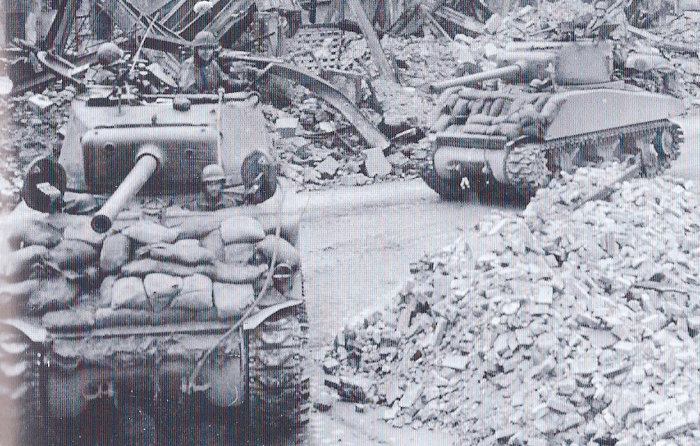
The above photo of a US Army M4A3(76) in Germany, 1945, will be my inspiration for the Armourfast model. Covering the bow with sandbag armour and the rear with storage will negate the need to build the lights and light guards. This M3A3(76) above has the commander's all-round vision cupola with the round split loader's hatch. The spotlight has been removed from the turret roof. In this head-on view the turret shell appears to flair our wider, something not so evident on the completed models. Even though the hatches are all molded closed on the two models, here we have a good view of the open hatches. I understand that wearing steel helmets rather than the leather tanker's helmet was common when poking their heads out of the hatch. This is one of the initial T23 turrets with the additional, fourth, lifting ring on the port side just forward of the loader's hatch. Laying on the fender braces is a support for the load of sandbag armor. There is no side sandbag-armor held on by a steel frame to the hull or turret sides implying this is a field modification, not in a maintenance workshop. I am surprised that this load of loose bags can stay on during a rough ride. I do not see anything other than a short faint line that may indicate a length of wire tied to the lifting cable or horn guard. The suspension is the VVSS type like on these model kits though I cannot make out the wheel types The track has extenders, also known as duckbills. I see no markings on the two tanks, no stars or serial numbers.
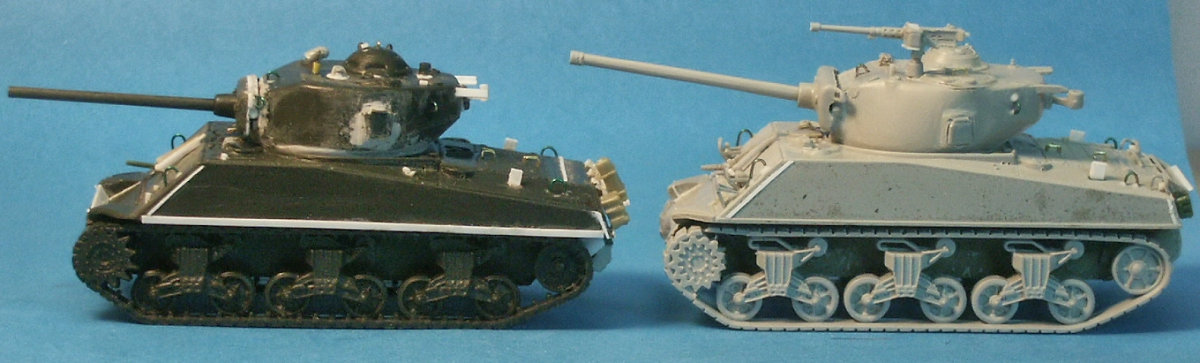
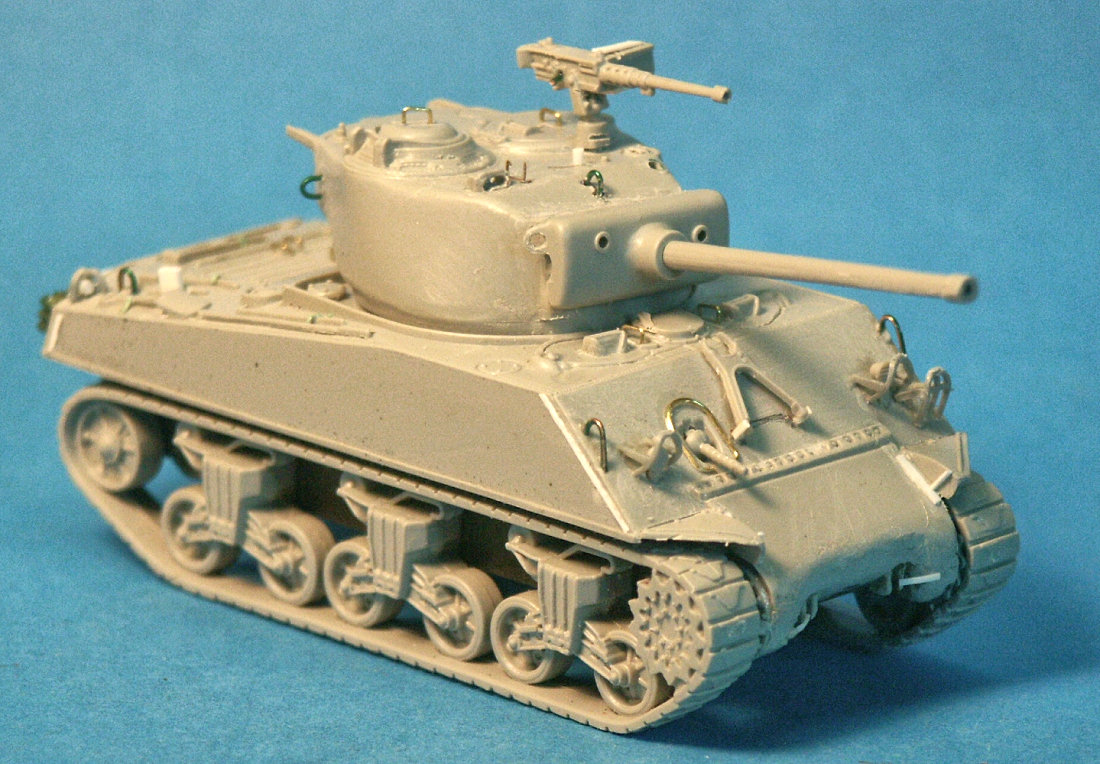
Above is the two wargamer M4A3 kits assembled and detailed. At left is the dark green plastic HaT (Armourfast) model, at right is the pale gray Italeri kit. I had not expected that the Italeri model would be a millimeter or two taller than the HaT model. The Italeri model has a noticeably longer gun barrel. I have not made any measurements and am keeping away from the scale issue. The most obvious detail issue for me is the lack of guide horns for the track, and poorly rendered turret pistol ports on both models.
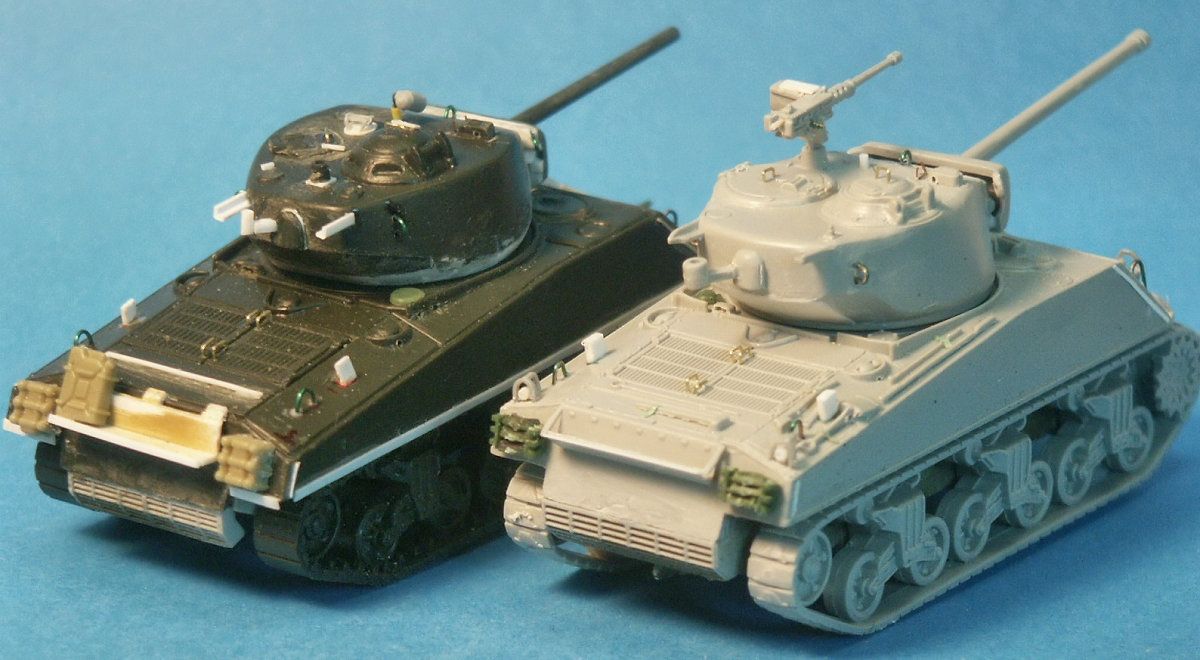
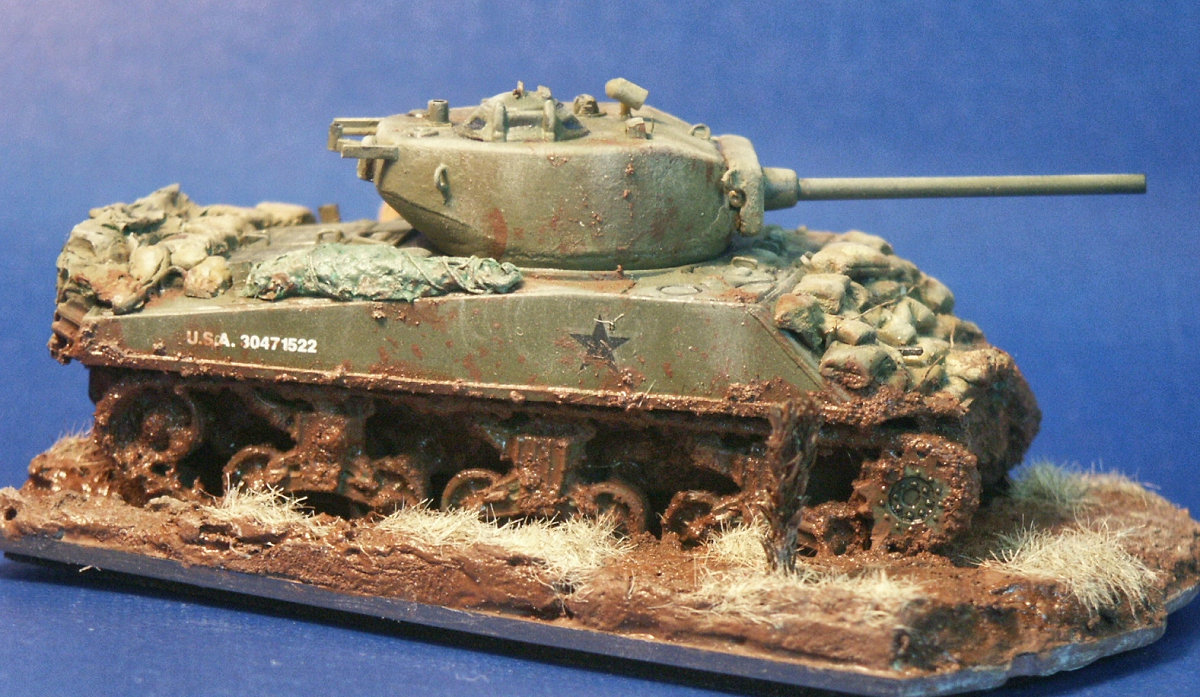
Starting again with the HaT model at left: the AA mg brackets have been scratchbuilt onto the turret rear. Also on the turret is a scratchbuilt spotlight. A rear grate-like engine exhaust defector was taken from a Trumpeter M4A3 model. At the rear corners are crude fixtures representing brackets of spare track from a PSC model. On the lower edge of the upper hull is a strip of styrene representing the strip to attach the side skirts. Since the Italeri kit has hand tools molded onto the engine deck I scribed along the bottom edges to give a more 3-dimensional look and added tie-down straps made from narrow strips of tape. Vertical engine door bumpers have been added to the engine decks of both models, made from thick sheet styrene. Rear storage racks were scrounged from other Sherman kits. Turret and hull lifting rings were replaced by copper wire. Grab handles on the crew hatches and engine hatches were simulated with fine brass wire. The Italeri M4A3(76) has a well rendered exhaust deflector grate (part 5) on the rear. The HaT M4A3(76) features the rear engine doors of the M4 and M4A1 but has no exhaust deflector which is needed to also mask the incorrect rear. I used an extra from a DML or Trumpeter Models from my parts box.
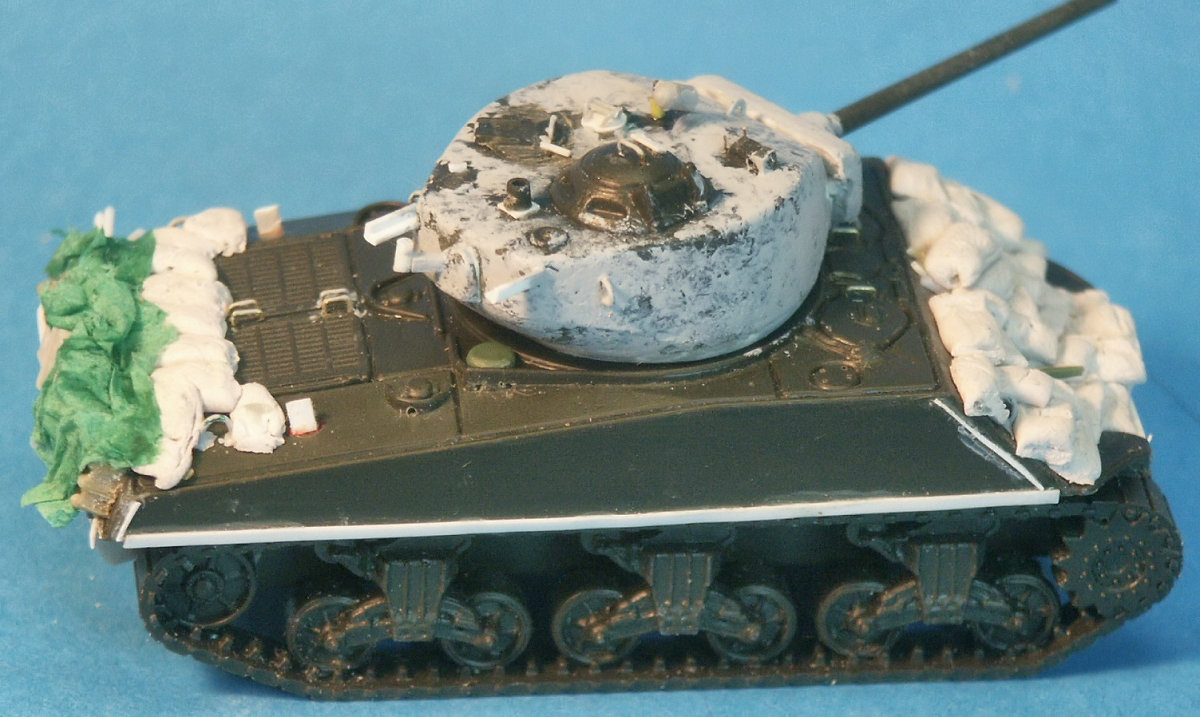
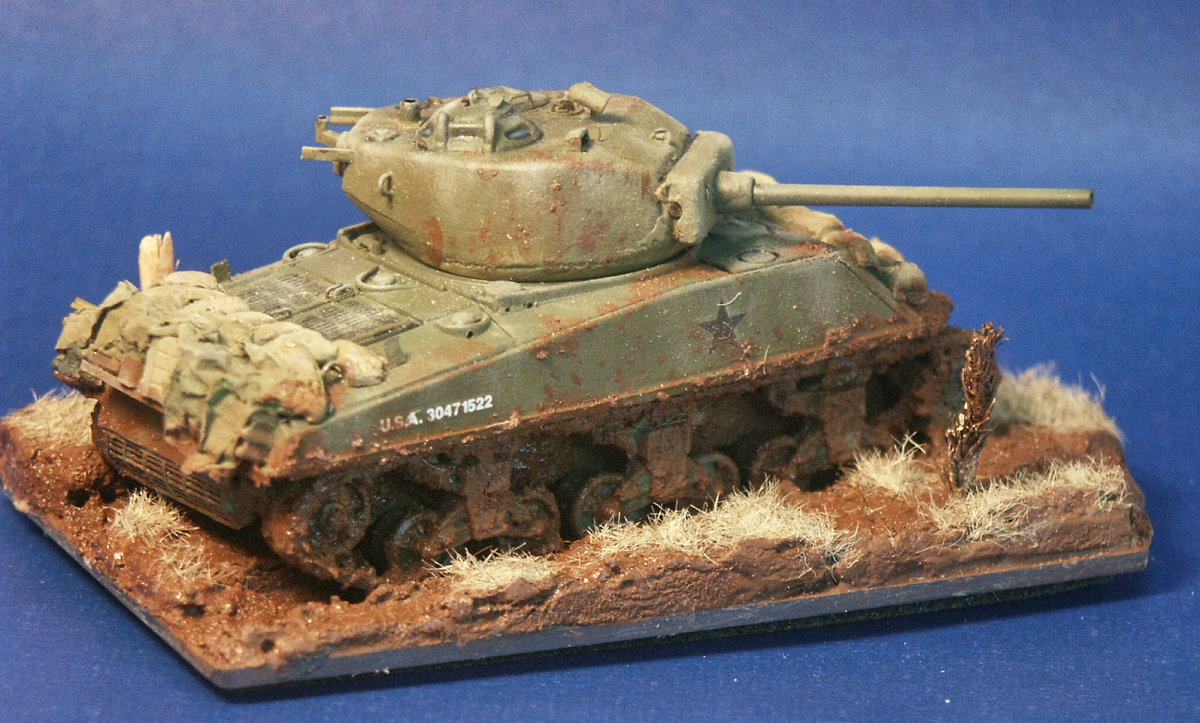
Since the HaT model will get a thick bed of sandbag armor on the bow and on the engine deck, and gear and tarps, there will be no need for adding lights and handtools. The M62 gun shield has been thickened considerably, shaped with model putty, and lift rings added at the upper corners. On the nose and rear, missing towing points were scratchbuilt from plastic. The one-piece differential cover looks too rounded, more like the middle period cast 1-piece differential cover, I believe it should look more like the sharp none, wedge shaped Italeri nose, but short of replacing it there is just so much that a file can do to reshape it. Across the glacis is a board to hold the sandbag armor. The molded-on gun travel lock was shaved off both models and replaced by extras from the Sherman spares box. Along the edges of the armor plates thin strips of styrene were glued to simulate weld beads. On the Italeri hull, lights, and plastic light guards were taken from DML and Heller kits; etched brass would have been better but I did not think the kits worth the expense: compromise, compromise. The Armourfast (HäT) M4A3(76) kit 99012
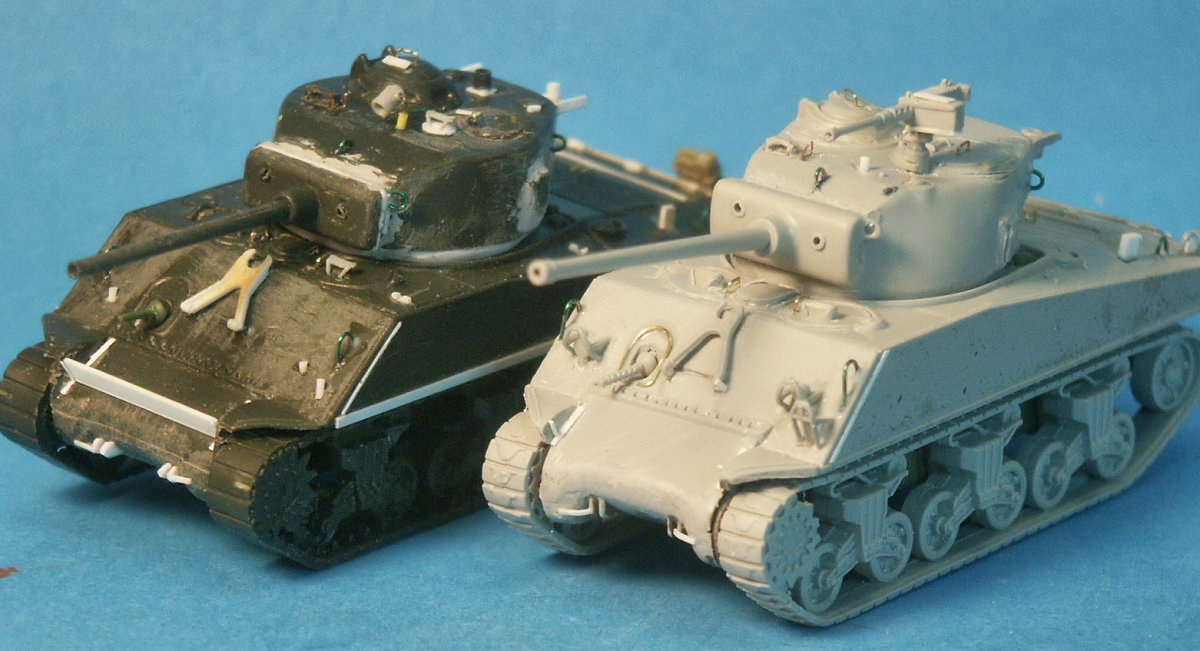
The HaT M4A3(76) turret has a coat of Mr. Surfacer to replicate a cast steel texture. Sandbags have been made from epoxy putty and laid across the glacis and rear. The sandbags were an attempt to help protect the tank from the Panzerfaust and Raketenpanzerbüchse rounds.
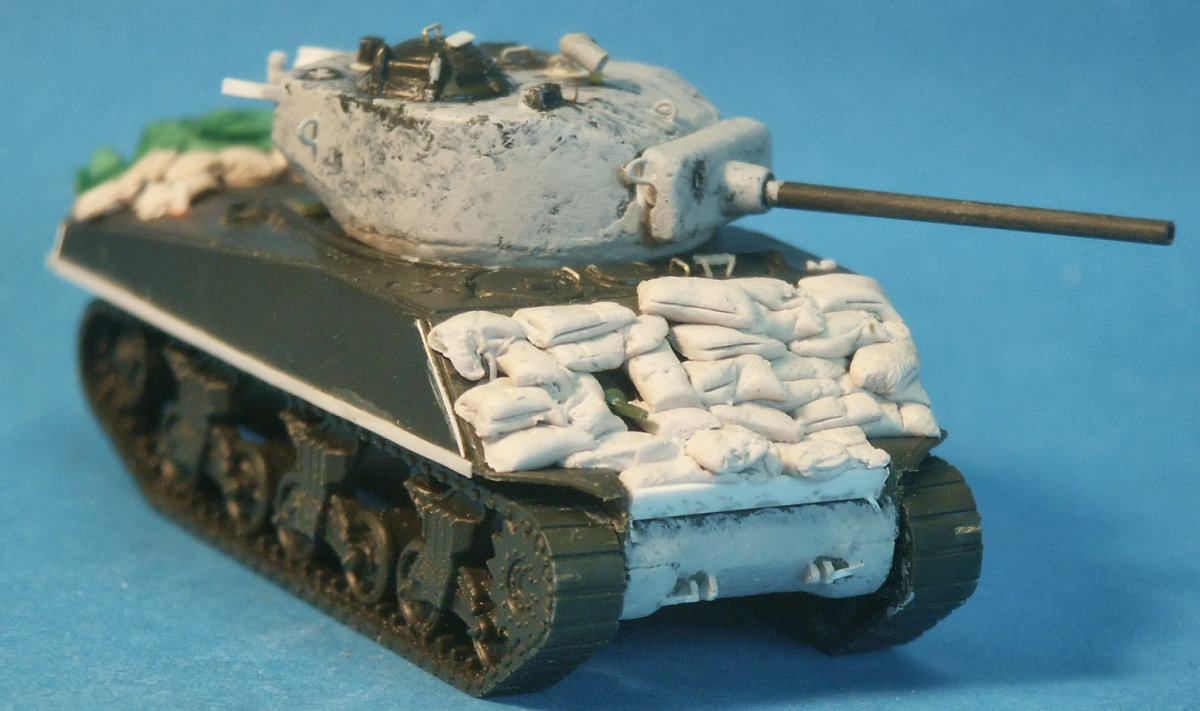
The gun muzzle has been drilled out on both models. The differential cover has a coat of of Mr. Surfacer to replicate a cast steel texture.
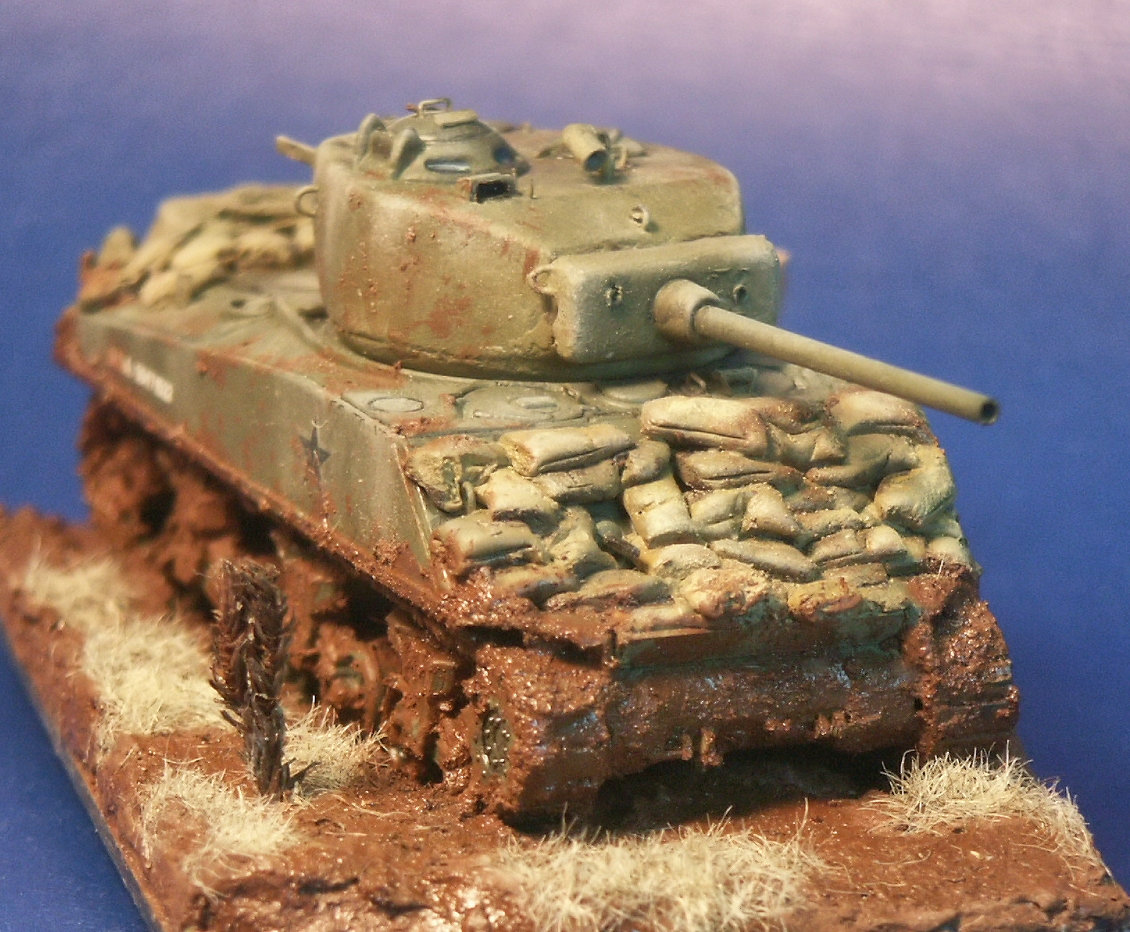
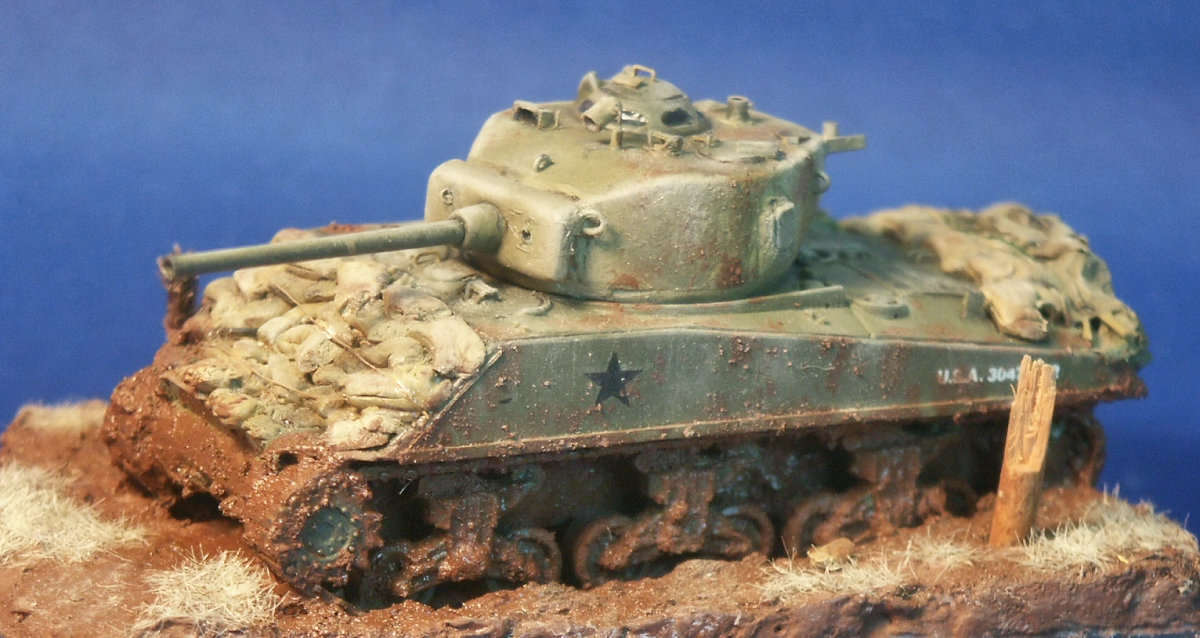
The sandbags conceal the missing features on the bow and the mud conceals the missing track features, and both combine to make a decent historical representation of a U S Army M4A3(76) stuck in the mud of NW Europe in the autumn of 1944 or Spring of 1945.
Since the HaT M4A3 model comes with no decal markings I had to scrounge mine from the spares box; these I think came from a Trumpeter model.
After I took this photo it occurred to me that the handtools on the right side of the engine deck are missing and there are not even any brackets for attaching them. This is a good view of the drain holes drilled into the rear of the turret and fuel cap splash guards.
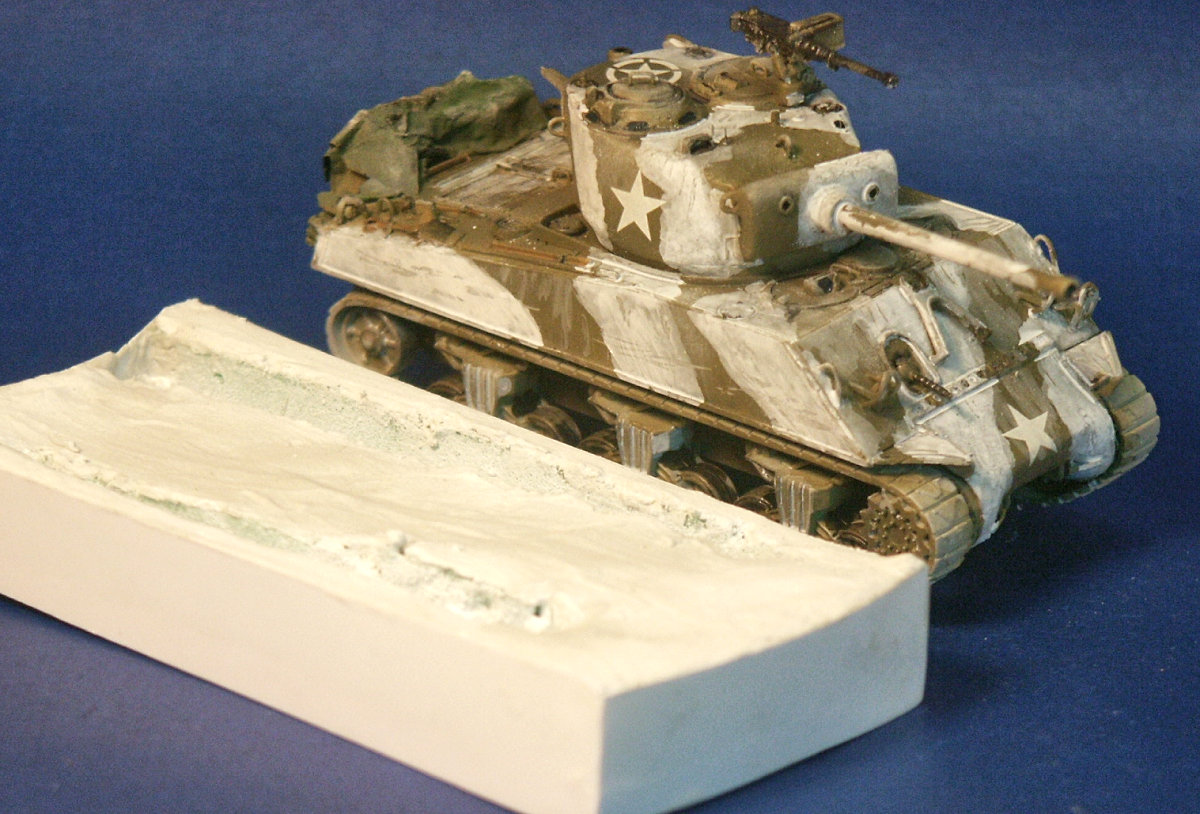
Okay, a rolled up tarp partially masks the missing handtools. Italeri kit M4A3(76) No 7521
The Italeri model assembles well and like the HaT kit but still needs improvements like weld beads, a new gun travel lock, fender brackets, headlight guards, engine door bumpers on the engine deck, and new lifting rings.
The gun mantlet is a lot better than that from HaT but the gun mount area on the turret behind the mantlet needed some filler and shaping.
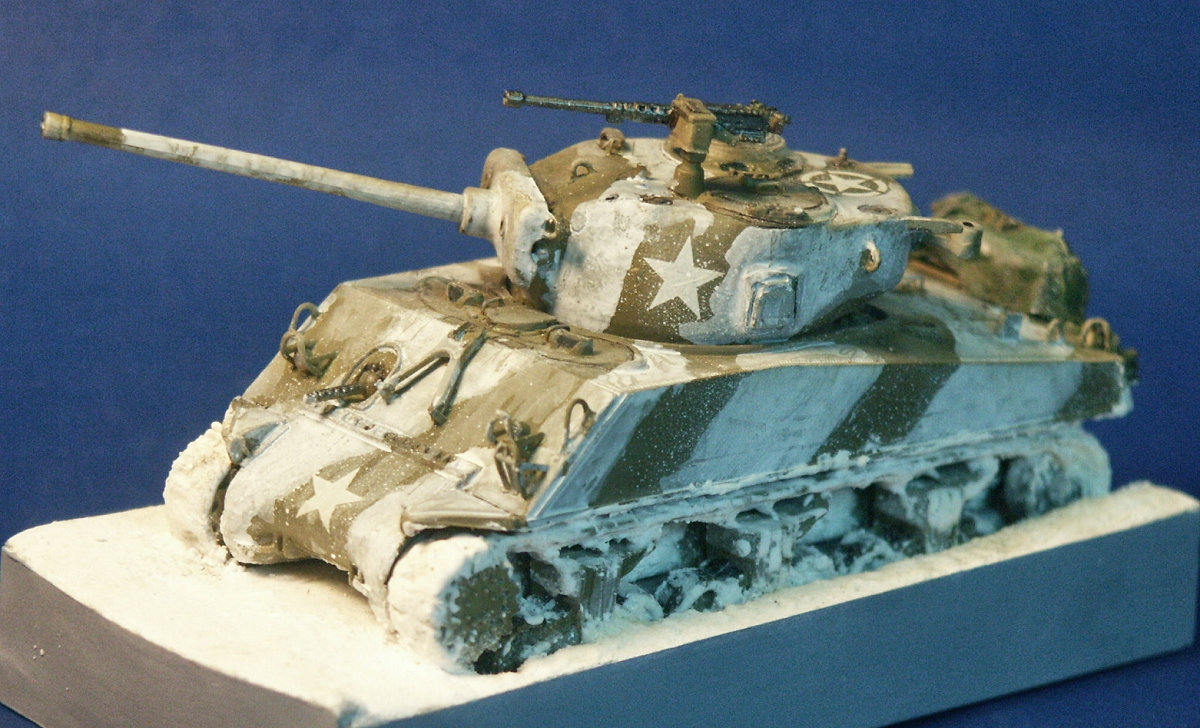
While the HaT model was given a base of mud to distract us from the poor track, the Italeri model will be portrayed in deep snow. A base is made from stiff closed cell foam in a box of styrene plastic. The foam is coated in plaster which was sanded smooth and painted white. The white camouflage is hand painted to represent a hand painted field application and is meant to be irregular and meant to be somewhat transparent and sloppy looking. The white was often water based whitewash applied with a brush or a rag.
Conclusion The Italeri model is the superior one as far as shape of the turret and accuracy of the details. Both assemble well. The Italeri model goes together without glue if that is important to you. Both HaT and Italeri feature some of the same simplified detail features like hand tools and lights. The HaT (Amourfast) M4A3 is lacking the handtools, which for some could be better than having them molded onto the hull. References The Sherman Design & Development, Son of Sherman, Volume 1, The Ampersand Group Inc. (2013) Armored Thunderbolt, The U.S. Army Sherman in World War II, by Steven Zaloga, Stackpole Books (2008), ISBN: 978 0 8117 0424 3. I have the highest recommendations for this book; for a modeling and history fan this book was an absolute pleasure to read, twice. http://the.shadock.free.fr/sherman_minutia/manufacturer/m4a376w/m4a3_76w.html |