| M4A3 Sherman | ESCI |
| Article by Doug Chaltry; last updated 1 January 2009 | |
 |
|
| Modeling the Sherman Tank in 1/72nd Scale |
| M4A3 Sherman | ESCI |
| Article by Doug Chaltry; last updated 1 January 2009 | |
|
|
| I
have a framed lithograph on my office wall from Despair.com. It shows a sinking ship with a saying
beneath it: "Mistakes - It could be that the purpose
of your life is only to serve as a warning to
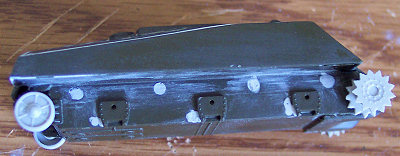
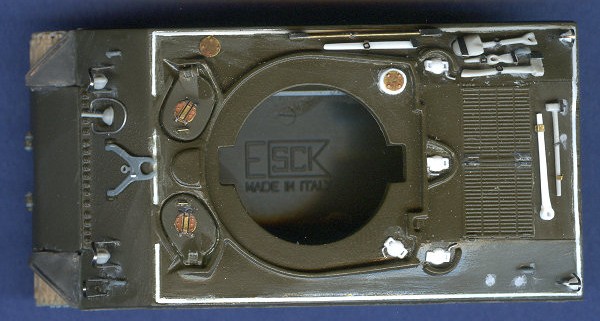
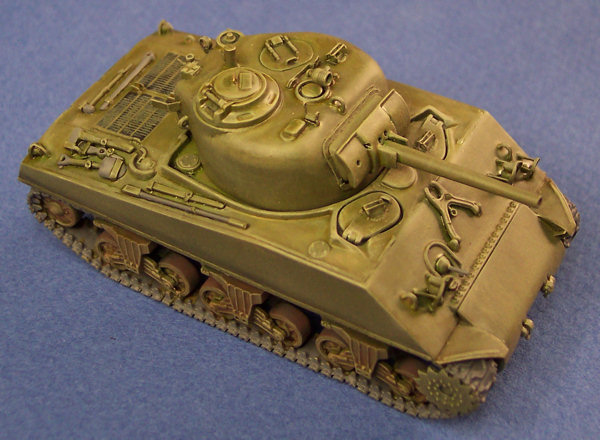
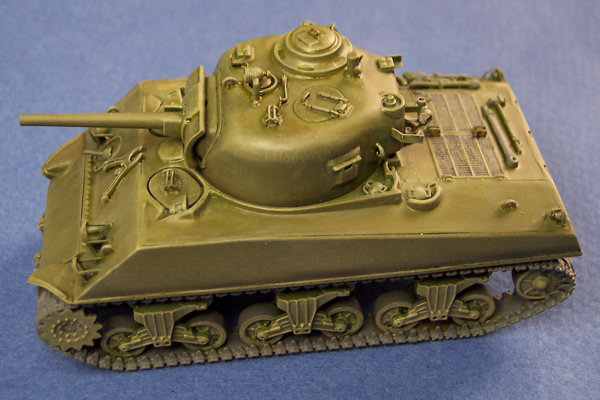
others." That is going to be the purpose of this article. It was originally intended to be a construction review of the ESCI M4A3W, but as you'll see, I screwed up this project so badly that hopefully others may learn from my mistakes. I originally received this kit in trade many years ago from Michel Saberly, who agreed to part with it on the condition that I actually build it and not simply keep it as a collector's kit. Since I fully intended to build every kit in my collection, I readily agreed. Unfortunately, this was at the same time that my life became consumed by the operation of On The Way!, and this kit ultimately spent the last several years buried in my closet along with the rest of my collection. Now that I have more time for modeling, I perused my list of Sherman kits and thought, "What better kit to get back into the swing of things, than this old stalwart?" So I went to work. Unfortunately, this project had several false starts thereby limiting my options with marking schemes. The 75mm version of the big-hatch M4A3 wasn't exactly a rare tank, though it was not as common as other variants. One of the most well-known users of this version was the US Marine Corps, and I decided early on that I wanted to build this as a Marine tank on Iwo Jima. I have really nice decals for a couple vehicles in the 5th Marine Tank Battalion, and I also have a set of wooden side armor from Leva that I wanted to use. The only real conversion needed for this kit to make it appropriate to the Marines on Iwo was to carve off the split commander's hatch and replace it with an all-around vision cupola. I did this using a cupola from an Extratech Firefly IC kit, which doesn't need it. Once this task was complete, it was simply a matter of adding a whole bunch of detail to the kit. But before I started in on that, I wanted to make sure that the wooden side armor from Leva fit the kit without much alteration. It did not. I'm not entirely sure which kit these resin parts were intended for, but they are MUCH too long for this ESCI kit. Perhaps Leva used the Hasegawa kit as a base? While it would have been fairly easy to shorten the rear portion of the wooden armor to make it fit, at this point in the project, I had second thoughts about my Iwo Sherman plans. First of all, this ESCI M4A3 hull is a little bit short, by a couple of millimeters. When I added the side armor, the width of the tank increased substantially, thereby accentuating the short length of the kit making the top view almost a perfect square, which I think looked pretty silly. Additionally, the pattern and details on the side armor did not match exactly the photos of the Marine tanks for which I have markings. Since building an accurate Iwo Sherman was going to take a lot of trouble super-detailing the tank, I decided that it would be better to scratchbuild new wood armor that was accurate for a specific vehicle. Also, let's face it: this ESCI kit is lacking in detail in several areas, particularly relative to newer Sherman models. So I thought that if I was going to go through all of the extreme effort of detailing the kit, adding wooden armor, and particularly all those hundreds of nails all over the hatches and periscopes, that I would save that level of effort for a Dragon kit, which already has really nice details and accurate hull dimensions. So, if I was not going to do a Marine Sherman, what would I build? I thought I could use the Classy Peg markings from the Trumpeter kit, but that vehicle had a split commander's hatch, not the cupola. Since I typically assemble my models using superglue, the cupola that I had added was not simply going to pop right off again. This became a problem. Did I have any markings for a vehicle with the commander's cupola, other than the Marine Shermans? I can't find any. I decided that in lieu of marking this tank as a specific vehicle, I would do what I normally do and just use some generic markings. According the book French Shermans of the Liberation, the French 2nd Armored Division had the M4A3W in its stocks. Though I cannot find any photos of a French M4A3W with the commander's cupola, there are drawings in this book of the various Sherman models given to France, and the M4A3W depicted in this drawing has the cupola. Thus, I decided to build this model into a "generic" Sherman of the French 2nd Armored Division. Back to the construction: Aside from the ESCI kit's too-short hull, the other glaring weakness of the kit is the suspension. The first thing that needs to be done is to fill all of the ejection pin marks on the side of the hull behind the wheels. I had originally thought that these would not be visible on a completed model, but thanks to Dave Showell making this error on one of his competition kits, I now know better :-)
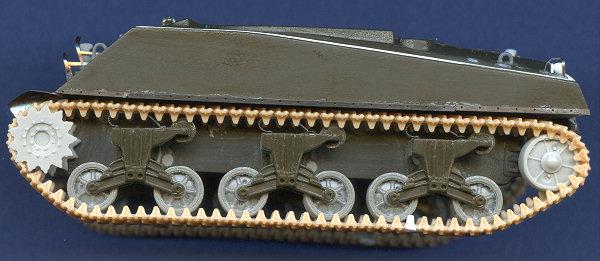
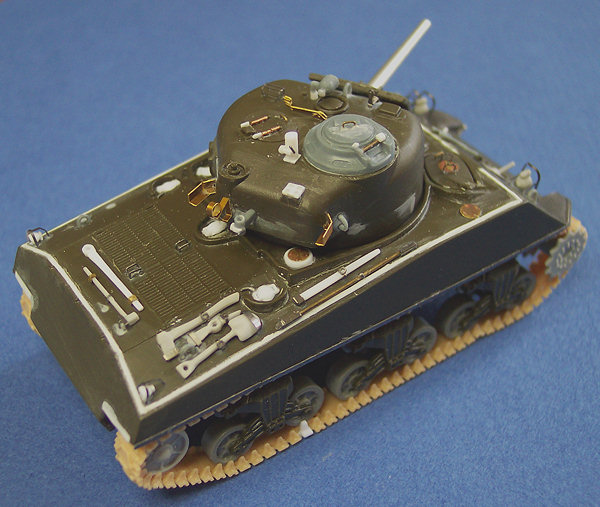
The sprocket wheel is short one tooth, and the road wheels are very poor, looking like a cross between the stamped and cast variety. So I decided to replace almost the complete running gear. I used the ESCI bogie trucks, but I carved off the track return skids from the top to replace them with etched metal. I replaced the road wheels with the stamped wheels from Calibre72. I used the sprocket and idler wheels from a spare Trumpeter kit, and the tracks are from a Dragon kit.
I had originally chose the T-54E1 style for my Iwo Jima plans, and this track style works perfectly well for a French tank as well. For some reason the tracks were one link too short on each side. I find this interesting since the ESCI hull is a little too short. Perhaps it's just the ESCI upper hull that's short, and not its lower hull or suspension. Also, I don't attach soft plastic tracks to my models like most people. The normal method is to glue (or melt) the two ends of the track together, and then stretch the track over the built suspension. I don't like this method because it puts undue stress on the glued wheel parts, and it often results in the track becoming mis-shaped as it wraps around the sprocket and idler wheels. So instead, I keep the track ends unglued until I have it wrapped around the wheels, and glued to each wheel it comes into contact with. This is very important in making it wrap convincingly around the sprocket. However, this also takes up whatever slack was in the track, and may have been the cause of the track being too short. Regardless, I made up the extra link on each side from an old Revell Sherman kit.
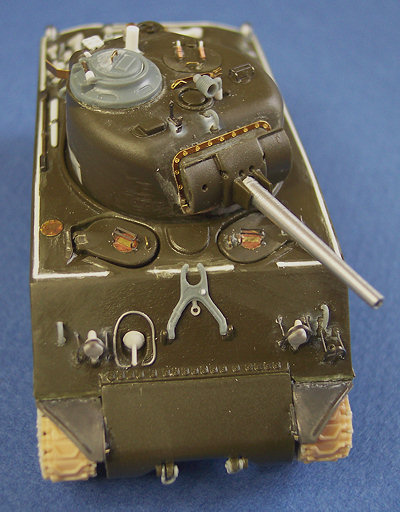
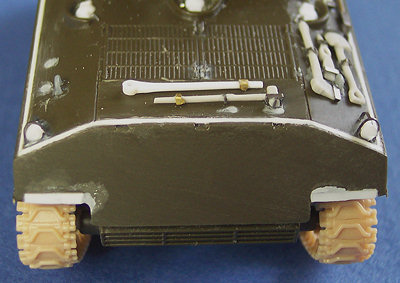
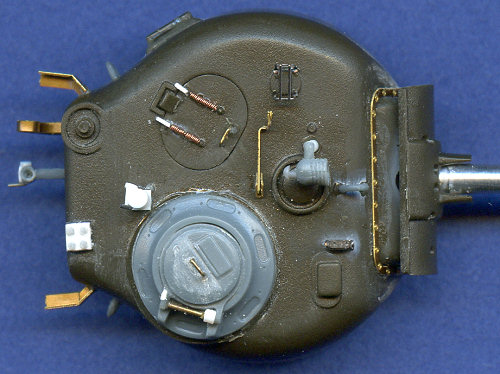
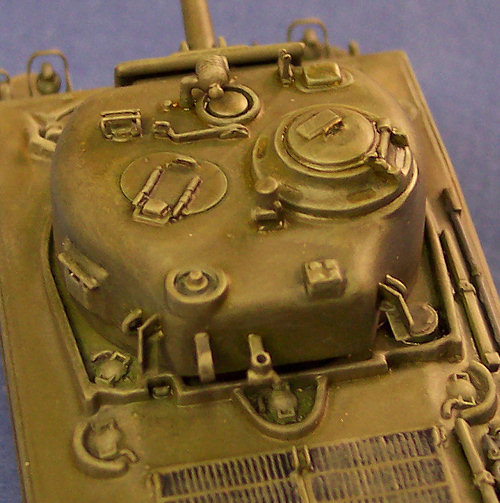
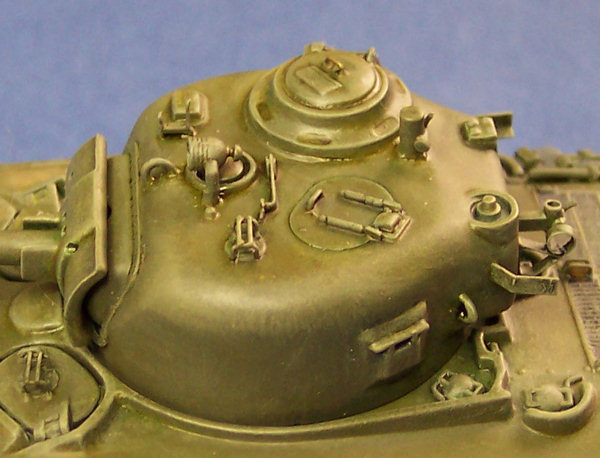
I made a few corrections to the upper hull. First, I filled in the large groove around the hull perimeter that is supposed to represent the weld lines between armor plates. I used very fine Evergreen styrene for this, and sanded it almost smooth, leaving just a small amount standing above the armor surface. I also carved off the fluid filler caps, as they were fairly poor on the original, and replaced them with parts that I had carefully cut off the Revell Sherman kit, which look much better. I added cap latches made from very fine fuse wire.
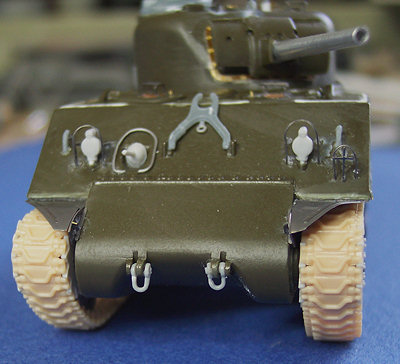
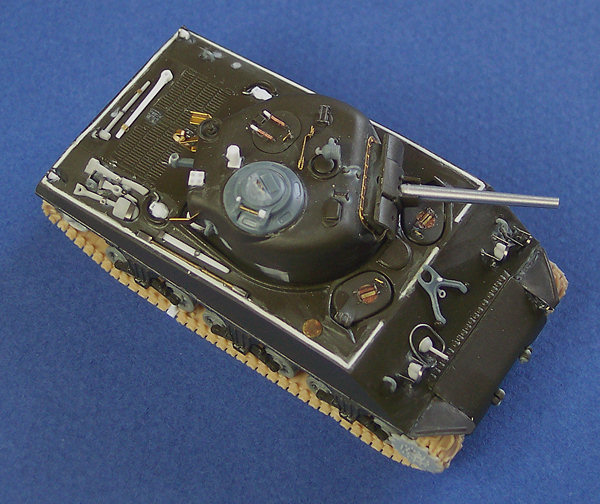
The ventilator cover to the rear of the turret was also replaced in this manner, with some bolt detail added from an etched part from an old Eduard detail set. This brass set also gave some pieces for the crew hatch periscopes. The pioneer tools were carefully sliced from a Trumpeter M4 hull, and carved into shape, with some of them being scratchbuilt. Lift rings were from an Extratech kit (which comes with spares). Headlights are from Trumpeter. Tailights and the turret machinegun mount were scratchbuilt. The gun travel lock came from the Extratech Firefly, which doesn't use it. The track return skids, front fenders, and numerous other etched details came from a newer Eduard set designed for the Trumpeter M4 kit.
What else? The spot light came from Extratech. The gun barrel is Aber. The bolted rim for the rotor mount came from a PART brass set, along with one or two other parts. The hatch handles were made from brass wire, and the springs on the loader's hatch were made from very fine copper wire. Unfortunately, the nice detail from these homemade springs was lost when painted. If you look at the pre-painting pictures, you'll see some other miscellaneous parts that were scratchbuilt, or scavenged from several brass sets.
Painting And here we get the worst painting fiasco I have ever experienced. This is what has delayed the completion of this model. I put on a base coat of Polly Scale acrylic olive drab, which is very nice paint. Smooth finish and complete coverage with no thin or splotchy areas. I was very happy at this point. Then came the wash. I normally use a wash made from a solvent called Turpenoid, which can be found at most art stores. But I couldn't find any Terpenoid at the store this time. What the store DID have, was called Turpenoid Natural, and being a "green" sort of guy, I bought it. When I mixed my wash, I noticed that this solvent was very thick, almost like a vegetable oil. I should have stopped there but I didn't. I applied it to the model but it looked horrible. It never dried. I let this thing sit on my workbench under a fan for over a month, yet the surface was still tacky to the touch. Only now it had some dust also adding some nice surface texture. Finally I found some normal turpenoid so I tried to wash off the crap that was on the model, being careful not to break off any of my hard-built detail. I managed to get some of it off, but not all of it. It still would not dry completely. I tried painting over it with a thin layer of olive drab, but it just oozed right through it. Then I tried to cover it with an enamel clear flat (Testors Dull Coat, from a spray can). That helped a lot, but it was still seeping through in some areas. So I gave it another coat, and then another. Finally, the kit was flat, and dry. But now it looked absolutely ridiculous, because the solvent had discolored the base coat of paint, and it also now had a layer of dullcoat several scale inches thick obscuring much of the surface detail.
But I refused to accept reality, and I actually continued with the painting. I started to paint the tools, I highlighted some of the base coat of olive drab, I started on the tracks, I even started adding some chalks for weathering. At some point, however, it started to sink in that this was a lost cause.
That's where this project sits today. The only option I have remaining to me is to blast it with some oven cleaner to completely remove the paint from the model's surface, but I'm hesitant to take such a drastic step out of fear of destroying all of the delicate surface detail I worked so hard to add to the model. Also, I am unsure how the Dragon Styrene tracks may react to the oven cleaner. But I really have no choice, since it's either do this or bin the whole thing, which I certainly don't want to do after coming this far with it. So I think that some time in the next month or so, I'll have a go at it. I shall update this article with the results of this risky endeavor once I attempt it. Is this what modeling is all about? |
| Modeling the Sherman Tank in 1/72nd Scale |