| M4A4 Sherman | Dragon Kit #7311 |
| Article by Doug Chaltry; last updated 2 February 2011 | |
 |
|
| Modeling the Sherman Tank in 1/72nd Scale |
| M4A4 Sherman | Dragon Kit #7311 |
| Article by Doug Chaltry; last updated 2 February 2011 | |
|
|
| I'm sure you all will
find this easy to believe by looking at it, this is the
first model that I've completed in seven years. When I
gave up On The Way! in 2005, I was pretty burnt out on
modeling and it took me a long time to get back into the
hobby. Over the past two years or so, I've been dabbling
around on my workbench, trying to finish something. I
started a major project: correcting and super-detailing
an old ESCI M4A3, but then I suffered a major set-back
during the painting stage of that project. So I took a
step back and tried to take an objective look at my
modeling skills. I came to the conclusion that I am
seriously out of practice. I basically dove right into
the deep end with my M4A3 project, and I was in over my
head, so I decided that in order to properly get back
into the groove of things, I needed a simple, out-of-box
project to revive my modeling chops. And what better
model to do OOB than a Dragon kit? (See the
M4A4 Preview here.)
Throughout this review I'll be spending more time pointing out errors that I made during the project rather than highlights of the build. Building this kit was quite the learning experience for me, and I hope that others may learn from my mistakes as well. My first mistake: I need to have a clear goal up-front and not waver from it half-way through the build. As I said, I was looking for a quick build, so I decided that I was going to just slap this thing together without the use of any aftermarket items or even the photoetch that comes in the kit. I decided that I can use those parts for some other, more worthy project. I wanted to see what a Dragon kit would look like built straight from the box with no add-ons. But I wasn't able to do that, as you shall see. I had no intention of building a competition-quality model, and yet I found myself constantly thinking about what I could improve as I went along, and I had to restrain myself from doing anything extra.
It wasn't until after I started building the model that I realized I needed to pick a marking scheme for the tank. This is important because specific tanks often had specific modifications made to the vehicle that need to be planned for prior to construction. I have a bunch of after-market decals that are appropriate for the M4A4, but keeping with my goal of building OOB, I decided to use the kit decals. I chose the scheme for the Polish tank in the 1st Motorised Artillery Regiment, Polish 1st Armored Division, Falaise Gap 1944. I searched through my references and found a single photograph of this vehicle in Wydawnictwo Militaria #213, 1st Polish Armored Division, Vol. II. Careful examination of this photo revealed a couple of deficiencies with the Dragon kit for building this particular tank:
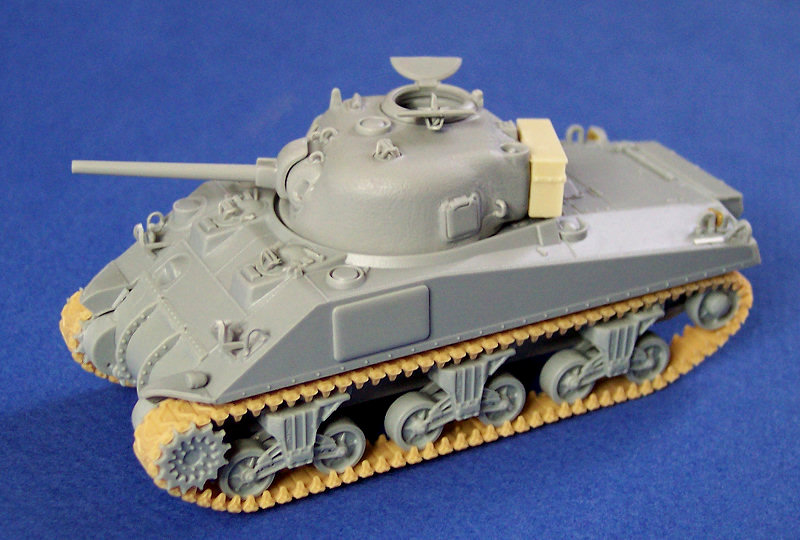
So much for building this project OOB. Construction There's really not much to say about the kit's construction. It was pretty straight-forward. The only problem area with the kit was the suspension. I don't know if anybody else has had any problems with Dragon's bogie suspension units, but the parts in my kit did not go together well at all. The front and rear halves of the suspension units fit together so poorly it was almost as though I was building a limited-run kit. I proceeded with construction without any major effort to clean up these parts, hoping that they wouldn't be too visible on the completed model, and if you keep the model sitting on a display base, that is certainly the case. But if a contest judge were to pick up the kit and look closely with a flashlight, the poor fit of these parts will be seen. Something to keep in mind for future projects, especially if I want to build something for entering into a show.
The tracks were just a bit too short, by about the length of half a link. This was probably my fault because of the way I mounted the tracks. The normally proscribed method of attaching soft plastic tracks is to glue the two ends together and then stretch the track over the wheels. This method typically results in bending the links in their middle as they are wrapped too tightly around the sprocket and idler wheels. What I normally do instead, is to glue the length of track to the wheels starting with the sprocket and working my way forward and backwards, gluing the track to each wheel it makes contact with, until the ends meet under one of the road wheels touching the ground. I figure that any mistakes in alignment can be hidden with some groundwork on the display base, as was the case here. It's possible that if I had assembled the tracks as called for in the instructions, I wouldn't have had this length problem. I counted the number of links in each track, 83, which is exactly the number they should have, so this is definitely a stretching issue.
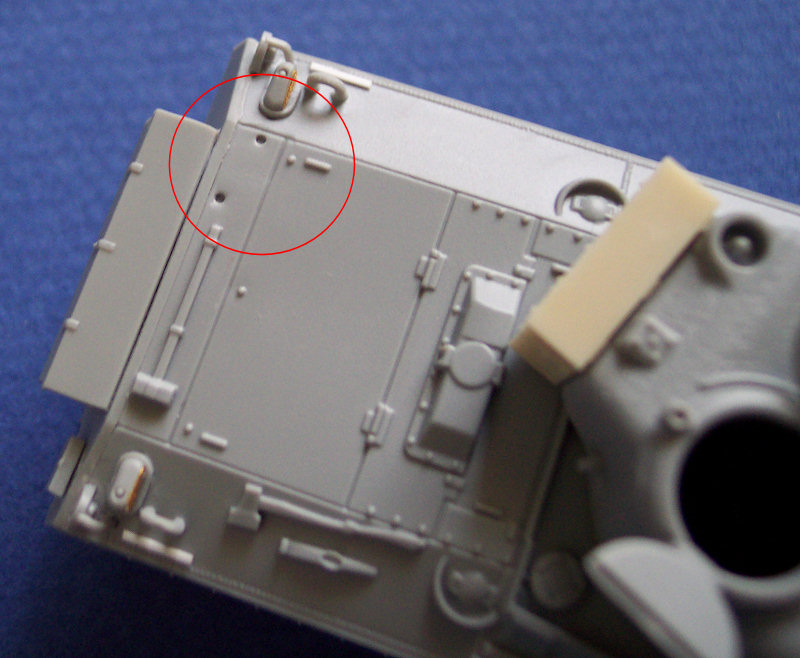
Another mistake I made: always, ALWAYS walk through the complete assembly sequence before hand, and check the details of all the major components looking for anything that needs to be fixed. I didn't do that. I just sat down and started gluing parts together. It wasn't until I painted the model that I noticed the two holes on the rear of the engine deck.
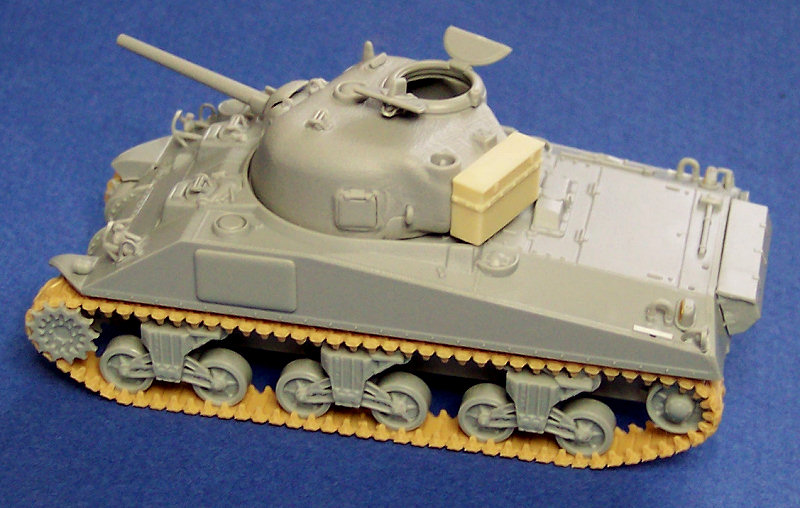
These holes are locator marks for the 17pdr gun travel lock, part of the Firefly VC kit, which also uses this hull. These holes need to be filled for the M4A4. Now, I admit, this was a stupid mistake on my part for missing this, but Dragon also bears some responsibility for this by not indicating anywhere in the instructions that the modeler needs to fill these holes. For future reference Dragon, if you are reading this, it would have been better to have these holes only partly molded through the hull, from the inside, and you should direct the modelers to drill open the holes the rest of the way for the Firefly kit. Anyway, I could have gone through the trouble of filling the holes and repainting, but I decided to take the coward's way out, and I covered the holes with a tarp (which actually can be seen on one of the photos I have of ROKITNO). This also serves to cover the hammer that is molded to the engine deck, which looks rather poor.
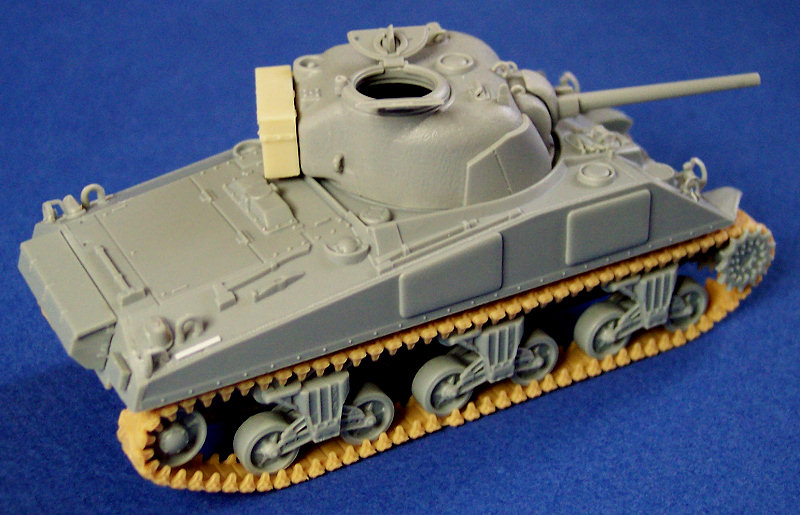
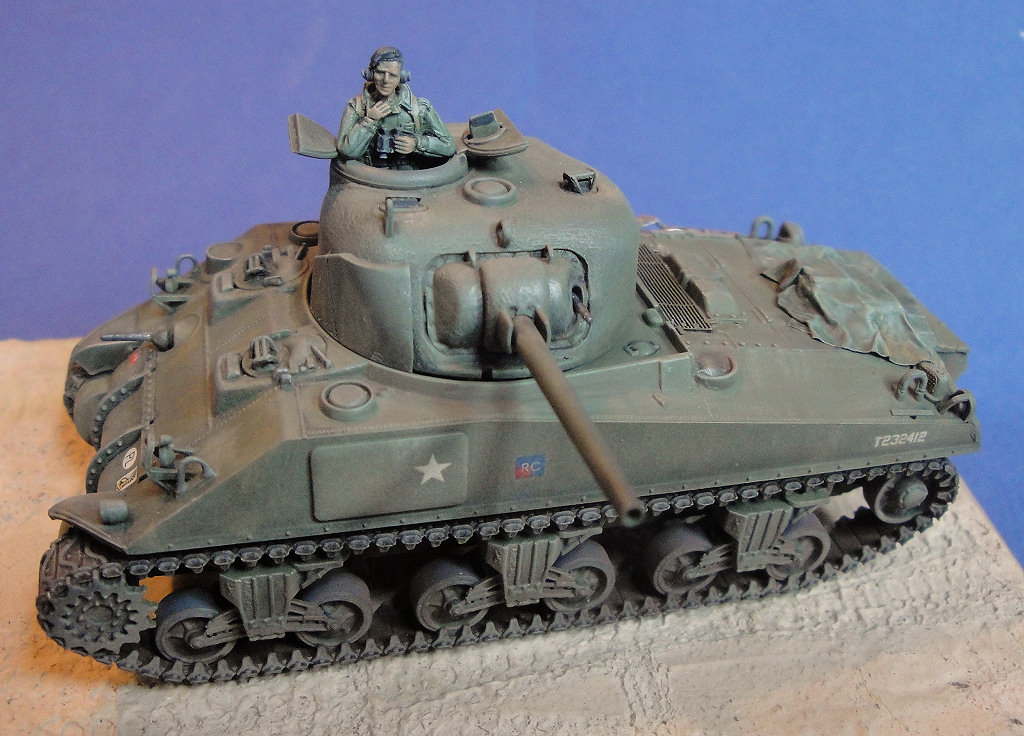
As for my goal of not using any photoetch, I couldn't stick to that intention because of the vent openings for the grouser bins. The openings are covered with small screens. All of the other photoetched parts are replacements for pieces that are also included in plastic, allowing the modeler the choice of which parts to use. Not so with these screens. They are included only as etched pieces so I had to use them, because the vent openings looked pretty silly without any sort of covering. The other etched part I used was the screen for the engine air intake on the deck beneath the turret bustle. I hadn't intended on using this piece, but after I painted the kit, I simply could not get the wash and highlighting on the molded-in screen to look good, so I added the etched piece after the fact and repainted that area. In retrospect, it would look a lot better if I had carved out the plastic screen from the hull prior to construction and replaced it with the etched part then, instead of after painting. Painting This is where I really need the practice. My painting and weathering skills have really rusted over the years. Although I think the final model is presentable, I'm not entirely happy with the end result, and it would certainly never win any contest, even without the other deficiencies described above. I painted the model Testors Acryl Olive Drab, and weathered it with a wash made from artist's oils dissolved in Terpenoid, and several shades of artist's chalks.
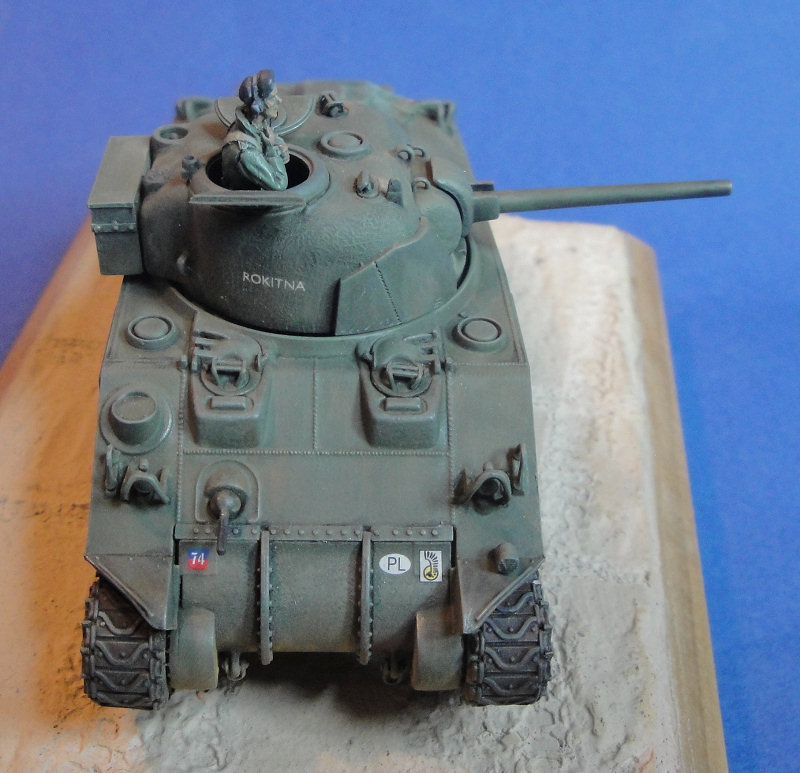
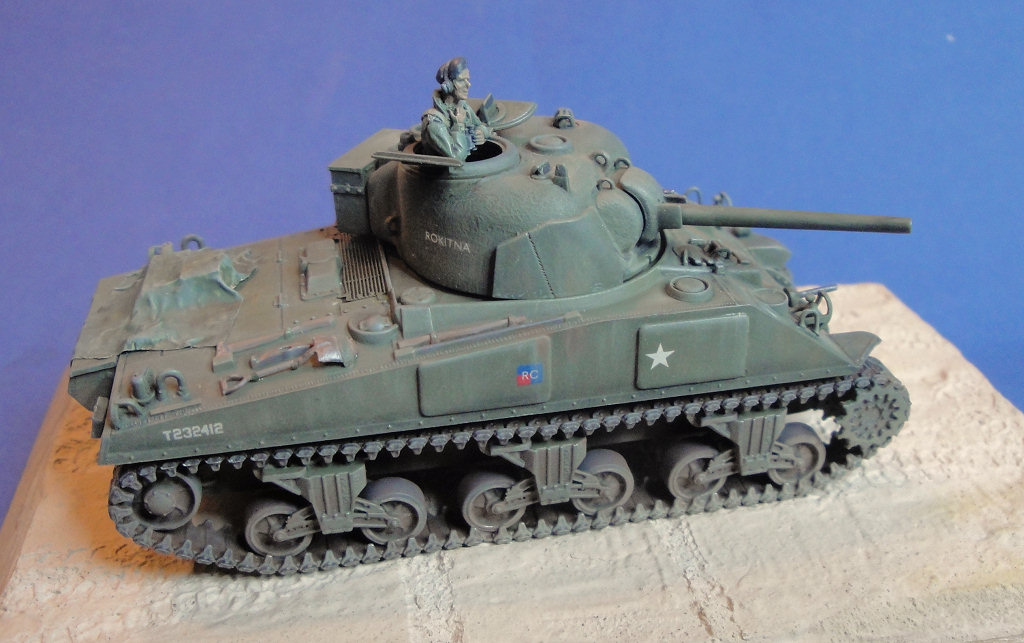
Applying the markings was mostly trouble-free. Dragon's decals are a little on the thick side, so liberal use of setting solutions is recommended. Based on photos, I made a couple of changes in the decal placement from what the instructions tell you to do. First of all, the tank name, "ROKITNA", goes on the side of the turret, not the hull side. Secondly, the AoS/serial code marking (decal #8) does not go on the right rear hull plate, but rather it was painted on the right side of the rear hull storage box. This marking should actually be a little larger than the decal is, but I wanted to use the kit markings, so I didn't bother looking for a replacement (there are several potential sources). In the photo I have of this tank, there DOES seem to be a marking of some sort on the right corner of the rear hull, where the instructions tell us to put the AoS, however I can't make out what that marking is. There also may be some sort of marking on the right hull side (and possibly also the left?) in between the "RC" mark and the white star, but it's very faint in the photo, so I don't know what it may be. And finally, I'm not happy with the hussar wing symbol of the 1st Armoured Division. I've never seen photos of this symbol outlined in black as are these markings.
After I completed the model, I found another photo of ROKITNO in Od Acromy do Zwyciezcy #7. This photo is of the left rear of the tank, and shows a couple of interesting points. It has the tank name ROKITNO on the hull side beneath the RC sign, so either the name was moved at some point from the hull side to the turret (or vice versa), or it was placed in different locations on opposite sides of the tank. The stowage bin on the turret rear is much clearer, and confirms the style I chose for this model. It also shows much stowage on the turret and hull, so perhaps some day I'll come back to this model and add some. One final annoyance about the decals, and this may seem like I'm just looking for something to complain about, but the decals for each marking scheme are scattered all over the decal sheet. I had to cut the decal sheet into a whole bunch of small bits in order to get to all the appropriate markings, which makes keeping track of the spare decals for future projects more difficult. Would it really have been that hard to group all the markings for each tank into specific corners on the decal sheet?
The figure is from Milicast. Technically he's a British figure, but the Poles used the same uniforms as the British, so he's a pretty decent stand-in for a Polish tanker (his beret would likely have a different cant to it).
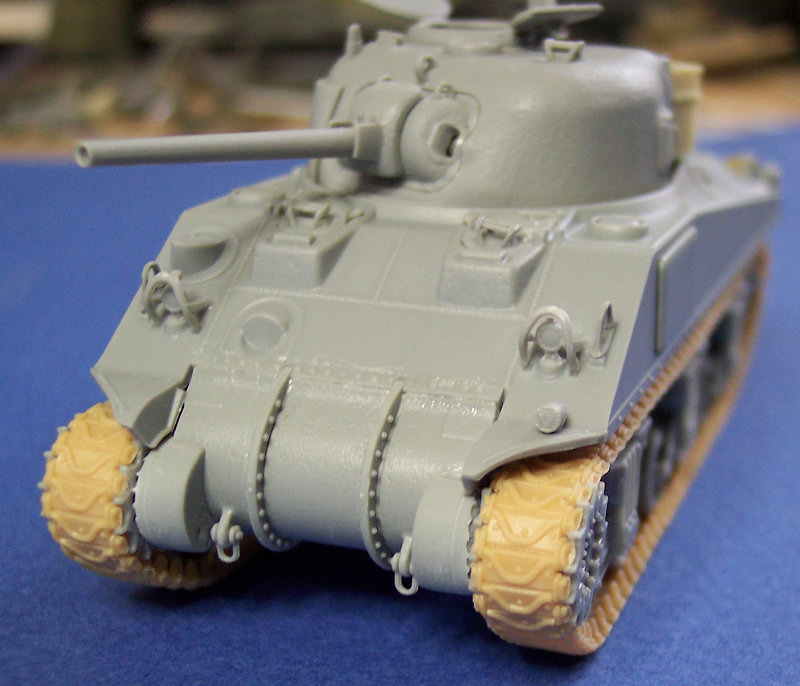
In the end, I do have some regrets on how I built this model. Yes, I wanted a quick, OOB project. But taking two years to complete isn't exactly quick. While my intention to not use any photoetch may have seemed a good one at the time, in retrospect, using the photoetched headlight and tailight brush guards would have been very simple, and improved the appearance of the final model considerably. Also, I really dislike the pioneer tools molded onto the hull. Yes, they look better than those of other kits such as ESCI or Trumpeter. But they still look very poor, especially when viewed from the side. Replacing these tools would have gone a long way to making this model a contest contender, without adding substantially to the construction time. The bottom line for these Dragon Sherman kits is that replacing the tools and using the included photoetch is all you need to do to make a contest-worthy model. |
| Modeling the Sherman Tank in 1/72nd Scale |